Kids love colorful aliens, bright paint, and getting just a little bit messy. Combine those things with a fantastic story, and you have the perfect afternoon activity. This fork painted alien craft brings the adorable, quirky creature from Tom Fletcher’s beloved children’s book, There’s an Alien in Your Book, straight to your kitchen table.
Creating art with unconventional tools like plastic forks helps children explore new textures and build fine motor skills. We will show you exactly how to guide your little ones through this fun, texture-filled art project. You only need a few basic craft supplies, a bit of imagination, and a plastic fork to get started.
Here is everything you need to know to make your own friendly space visitor!
Materials Needed for Your Alien Craft
You likely already have most of these items hiding in your craft closet or kitchen drawers. Gather the following materials before you invite the kids to the table:
- Heavy white cardstock or thick construction paper
- A sturdy plastic fork (silver or white works perfectly)
- Washable kids’ paint or acrylic paint (light blue, purple, and neon green)
- A small paper plate or paint palette
- Googly eyes in various shapes and sizes
- Craft glue (if your paint dries before you add the eyes)
- A black permanent marker
Step-by-Step Fork Painted Alien Instructions
This quick tutorial is designed to be completely stress-free. Let your children take the lead and make the alien look as neat or as messy as they want.
Step 1: Prep Your Paint Station
Squirt a quarter-sized amount of light blue, purple, and neon green paint onto your paper plate. Keep the colors slightly separated, but do not worry if they bleed together a little bit. Swirling the colors actually creates a fantastic space-like effect! Place a sheet of white cardstock in front of your child.
Step 2: Load Up the Fork
Hand your child the plastic fork and show them how to dip the flat back of the tines into the paint. Encourage them to pick up two colors at once. The fork acts like a stamp and a brush combined.
Step 3: Stamp the Alien Body
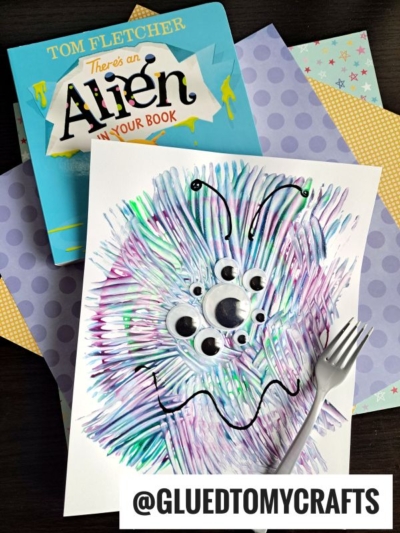
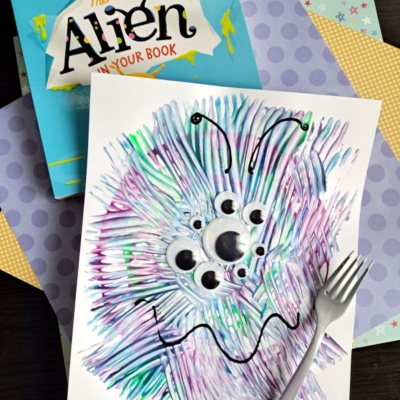
Instruct your child to press the paint-covered fork down onto the center of the white cardstock. Pull the fork outward slightly to create a fuzzy, spiky texture. Keep dipping the fork into the paint and pressing it in a circle until you form a round, shaggy alien body. The radiating lines will look exactly like the furry little creature from the book. Let the paint dry for a few minutes.
Step 4: Add the Googly Eyes
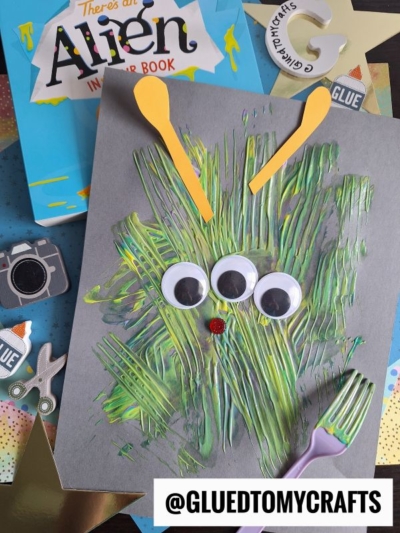
Aliens need to see exactly what is going on in your house! Once the paint is slightly tacky or completely dry, add the eyes. Grab a handful of googly eyes in different sizes. Cluster six to eight eyes right in the middle of the painted body. If the paint is still wet, the eyes might stick right to it. If the paint is dry, use small dabs of craft glue to secure them.
Step 5: Draw the Final Details
Grab your black marker. Draw two wavy antennas coming out of the top of the alien’s head, and add a small black dot to the tip of each one. Finally, draw a cute, wavy line for a mouth at the bottom of the painted circle. Your friendly alien is now complete!
Fun Variations to Try at Home
Once your kids master the basic fork painting technique, they will likely want to make a whole family of aliens. Here are a few ways to switch up the craft:
- Change the color palette: Let your kids pick their favorite neon colors. Orange, pink, and yellow make excellent warm-toned space creatures.
- Add glitter: While the paint is still wet, sprinkle some silver or gold glitter over the body to give your alien a magical, intergalactic glow.
- Create a background: Instead of white cardstock, use black construction paper. Have your kids use a toothbrush to splatter white paint across the background, creating a starry night sky for their alien.
RELATED —> Popsicle Stick “A” is for Alien Craft
Creating this fork painted alien craft gives you a wonderful opportunity to bond, read, and create together. Display the finished artwork proudly on the refrigerator, or cut the alien out and glue it to a popsicle stick to use as a reading puppet while you read your favorite outer-space book together.
On that note, gather your supplies and let your kids’ creativity run wild. Happy crafting!

Fork Painted Alien Craft Idea For Story Time
Here’s your checklist of supplies to bring this craft to life:
- School Glue
Prepare your creative haven by laying down a protective cover before the crafting magic begins!
Directions:
- Squirt a quarter-sized amount of light blue, purple, and neon green paint onto your paper plate. Keep the colors slightly separated, but do not worry if they bleed together a little bit. Swirling the colors actually creates a fantastic space-like effect! Place a sheet of white cardstock in front of your child.
- Hand your child the plastic fork and show them how to dip the flat back of the tines into the paint. Encourage them to pick up two colors at once. The fork acts like a stamp and a brush combined.
- Instruct your child to press the paint-covered fork down onto the center of the white cardstock. Pull the fork outward slightly to create a fuzzy, spiky texture. Keep dipping the fork into the paint and pressing it in a circle until you form a round, shaggy alien body. The radiating lines will look exactly like the furry little creature from the book. Let the paint dry for a few minutes.
- Aliens need to see exactly what is going on in your house! Once the paint is slightly tacky or completely dry, add the eyes. Grab a handful of googly eyes in different sizes. Cluster six to eight eyes right in the middle of the painted body. If the paint is still wet, the eyes might stick right to it. If the paint is dry, use small dabs of craft glue to secure them.
- Grab your black marker. Draw two wavy antennas coming out of the top of the alien's head, and add a small black dot to the tip of each one. Finally, draw a cute, wavy line for a mouth at the bottom of the painted circle. Your friendly alien is now complete!
CLICK HERE TO PRINT THE DIRECTIONS FOR THIS CRAFT