The holiday season brings a special kind of magic into our homes, and there is no better way to celebrate than by rolling up your sleeves for some festive crafting. If you need a quick, low-mess activity to keep little hands busy, we have the perfect project for you.
This paper plate and dot sticker Christmas tree craft is wonderfully simple, incredibly colorful, and totally kid-friendly. You do not need expensive supplies or hours of prep time. Instead, you can use basic materials you likely already have tucked away in your craft closet!
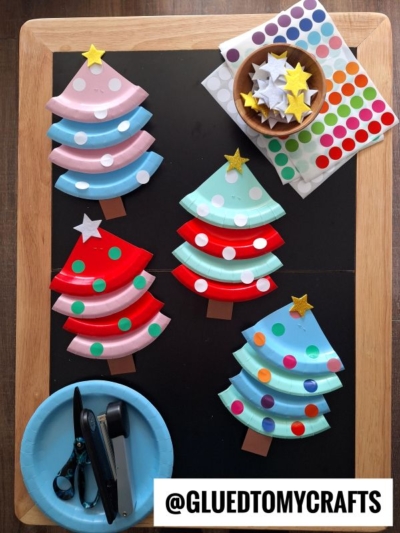
Materials You Will Need
Gather these basic crafting supplies to get started. You can easily find these items at your local dollar store or craft supply shop.
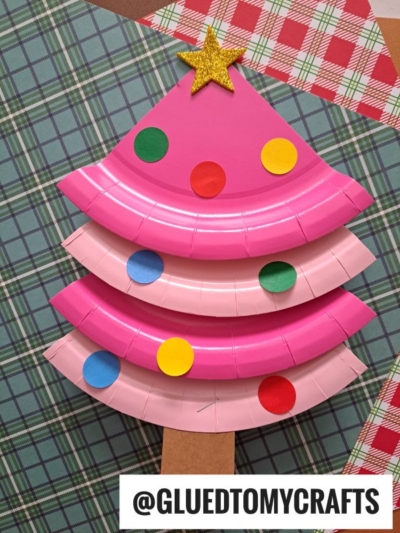
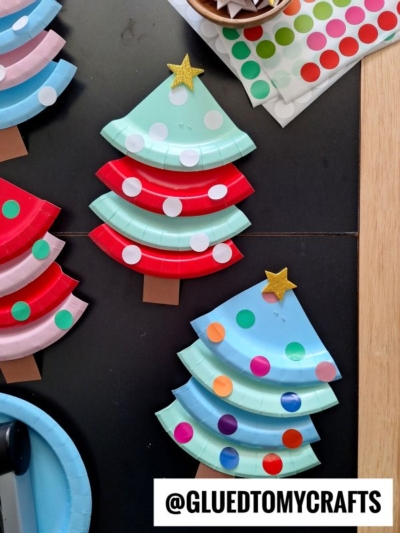
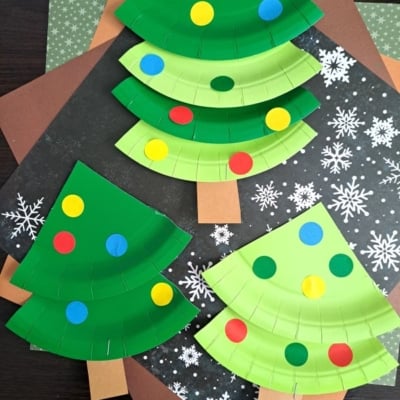
- Colorful Paper Plates: Look for standard paper plates in fun colors. Traditional green is great, but pastel pink, light blue, mint green, and bright red make for a uniquely vibrant, modern tree.
- Colorful Dot Stickers: Grab a few sheets of office dot stickers. White stickers work beautifully for a “snowy” effect, while multi-colored packs act as bright ornaments.
- Brown Cardstock Paper: You will need a small scrap to create the tree trunk.
- Felt or Foam Stars: A star is essential for the top of your tree. Glittery gold, yellow felt, or white foam stars all look fantastic.
- Stapler: A standard desk stapler works perfectly for connecting the layers.
- Scissors: You will need a good pair of scissors to cut the paper plates into wedges.
Step-by-Step Instructions
Ready to build your tree? Clear off a workspace, gather your supplies, and let the festive fun begin.
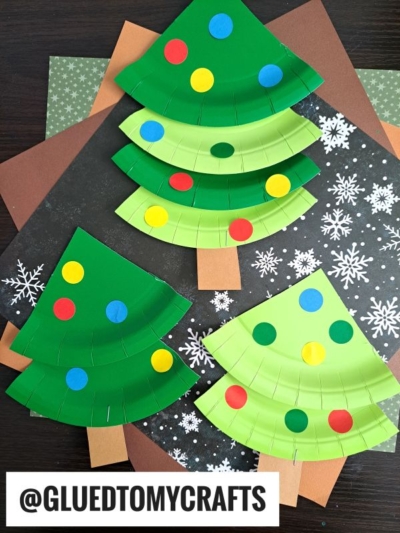
Step 1: Cut the Plate Wedges
- To create the tiered look of the Christmas tree, you need to cut your paper plates into triangular wedges. Take one paper plate and cut it into four equal quarters. If you want a multi-colored tree, cut up a few different colored plates. You will need four wedges total to build one complete tree. The curved, ribbed edge of the paper plate naturally creates a lovely scalloped texture for the bottom of each tree branch layer.
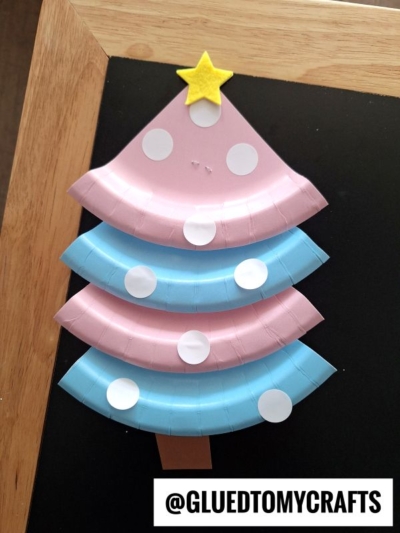
Step 2: Layer and Staple the Branches
- Now it is time to assemble the tree structure. Take your first wedge and lay it flat. This will be the bottom of your tree. Take a second wedge and place it on top of the first, overlapping them so the curved edge of the second wedge sits about halfway up the first wedge.
- Use your stapler to secure the two pieces together. Repeat this process with your third and fourth wedges, stacking them upwards to form a tall, triangular pine tree shape. Alternating colors – like mint green and red, or light blue and pink – gives the tree a fun, whimsical appearance.
Step 3: Attach the Tree Trunk
- Every tree needs a sturdy base. Cut a small rectangle out of your brown cardstock or foam. Slide the top of the brown rectangle slightly behind the bottom layer of your paper plate tree. Use a staple to secure the trunk in place.
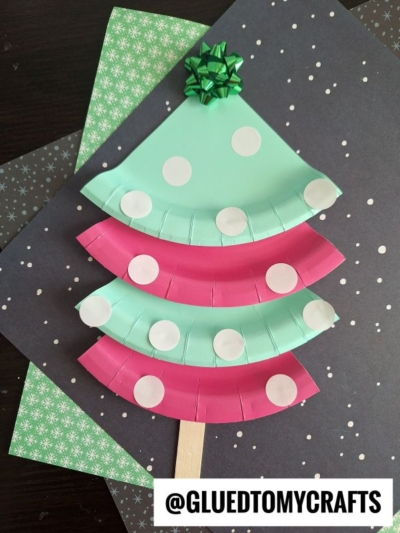
Step 4: Decorate with Dot Stickers
- Here is where the magic happens! Hand the sticker sheets over to your kids and let them decorate their trees. They can place colorful dot stickers all over the paper plate layers to act as ornaments.
- If they want a winter wonderland theme, white dot stickers look exactly like freshly fallen snowballs. The beauty of this step is that there is no wrong way to do it. Children can place stickers randomly, group them by color, or create specific patterns.
Step 5: Top It with a Star
- No Christmas tree is complete without a star on top. Grab a yellow felt, foam, or glittery gold star. Attach it to the very highest point of your top paper plate wedge. You can use a piece of rolled tape, a glue dot, or even a staple to secure the star securely in place.
- Once you are done decorating, it’s time to display it proudly for all to see!
RELATED —> Paper Star Shaped Santa Craft
Taking the time to craft with kids creates lasting holiday memories. This paper plate and dot sticker Christmas tree is the perfect way to spend a joyful, creative afternoon together. It proves that you do not need complicated instructions or expensive kits to make something beautiful.
Gather your paper plates, round up those stickers, and watch your children’s imaginations light up the room. Happy crafting, and have a wonderful holiday season! Happy crafting, my friends!

Easy Paper Plate & Dot Sticker Christmas Tree Craft
Looking for a fun holiday activity? Learn how to make a paper plate and dot sticker Christmas tree with this easy, low-mess craft tutorial for kids.
Here’s your checklist of supplies to bring this craft to life:
- Cardstock Paper
- Large Paper Plate
- Dot Stickers
- Embellishments
Prepare your creative haven by laying down a protective cover before the crafting magic begins!
Directions:
- To create the tiered look of the Christmas tree, you need to cut your paper plates into triangular wedges. Take one paper plate and cut it into four equal quarters. If you want a multi-colored tree, cut up a few different colored plates. You will need four wedges total to build one complete tree. The curved, ribbed edge of the paper plate naturally creates a lovely scalloped texture for the bottom of each tree branch layer.
- Now it is time to assemble the tree structure. Take your first wedge and lay it flat. This will be the bottom of your tree. Take a second wedge and place it on top of the first, overlapping them so the curved edge of the second wedge sits about halfway up the first wedge.
- Use your stapler to secure the two pieces together. Repeat this process with your third and fourth wedges, stacking them upwards to form a tall, triangular pine tree shape. Alternating colors - like mint green and red, or light blue and pink - gives the tree a fun, whimsical appearance.
- Every tree needs a sturdy base. Cut a small rectangle out of your brown cardstock or foam. Slide the top of the brown rectangle slightly behind the bottom layer of your paper plate tree. Use a staple to secure the trunk in place.
- Here is where the magic happens! Hand the sticker sheets over to your kids and let them decorate their trees. They can place colorful dot stickers all over the paper plate layers to act as ornaments.
- If they want a winter wonderland theme, white dot stickers look exactly like freshly fallen snowballs. The beauty of this step is that there is no wrong way to do it. Children can place stickers randomly, group them by color, or create specific patterns.
- No Christmas tree is complete without a star on top. Grab a yellow felt, foam, or glittery gold star. Attach it to the very highest point of your top paper plate wedge. You can use a piece of rolled tape, a glue dot, or even a staple to secure the star securely in place.
- Once you are done decorating, it's time to display it proudly for all to see!
CLICK HERE TO PRINT THE DIRECTIONS FOR THIS CRAFT
If you've enjoyed our content or have any thoughts to share, we'd love to hear from you! Mention @gluedtomycrafts or tag #gluedtomycrafts on Instagram!