One of the most beloved children’s books of all time is “The Very Hungry Caterpillar” by Eric Carle. It tells the story of a tiny caterpillar who eats his way through an amazing variety of foods before pupating and emerging as a beautiful butterfly. This timeless story of transformation has captured the hearts of children and adults for generations. The iconic, colorful art style makes it a perfect source of inspiration for a fun and simple craft.
This tutorial will guide you through creating your very own caterpillar inspired by the book. Using basic materials like a paper plate, cardstock paper and a circle punch, you can bring this classic character to life. It’s a wonderful activity to pair with a reading of the book, helping to improve reading comprehension and fine motor skills.
Let’s gather our supplies and get ready to create a cute caterpillar that looks like it crawled right off the page!
Craft Supplies:
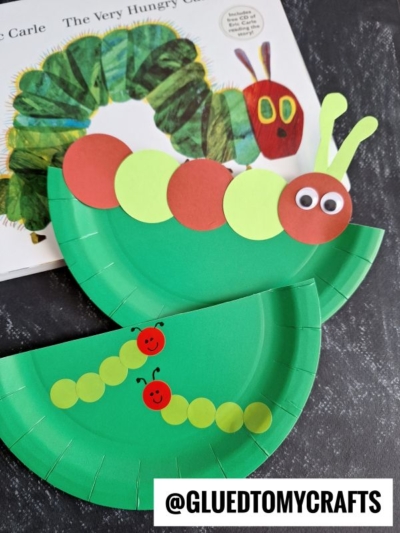
- Large Green Paper Plate (one makes TWO caterpillar crafts)
- Red Cardstock Paper
- Light Green Cardstock Paper
- Large Circle Craft Punch (about 1.5 to 2 inches)
- School Glue or Glue Stick
- Wiggle Eyes (two per caterpillar craft)
- Scissors
- Optional: Small decorative items like craft flowers, glitter, or sequins.
Directions:
Now that you have all your supplies ready, it’s time for the fun part! Follow these simple steps to create your paper plate caterpillar.
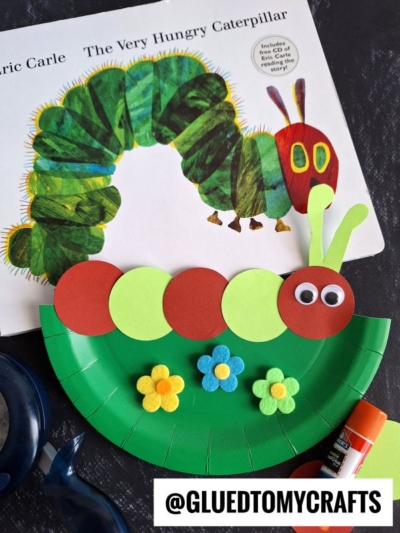
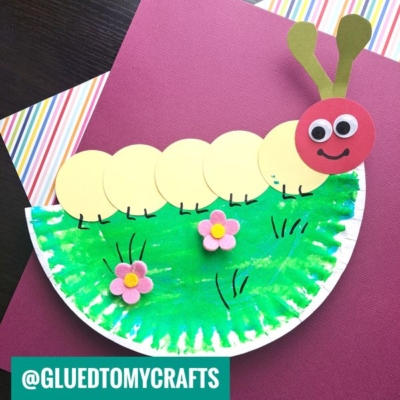
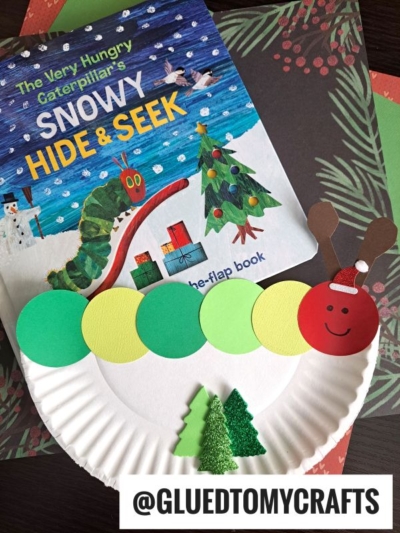
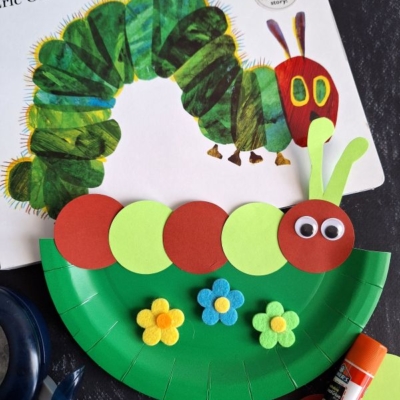
- Create the Leaf – Your caterpillar needs a big, green leaf to rest on. Start by taking your large green paper plate. This will become the leaf for your caterpillar – no painting or coloring required! If you’d like, you can use a marker to add leaf veins for extra detail.
- Punch Out the Circles – Take your red and light green cardstock paper. Using your large circle craft punch, punch out several circles from each color. For the classic “Very Hungry Caterpillar” look, you will need one red circle for the head. For the body, punch out about five to seven circles, alternating between light green and another color if you wish.
- Assemble the Caterpillar’s Body – Arrange the paper circles on the plate to see how you want your caterpillar to look. Start with the red circle for the head. Glue it down on one side of the paper plate. Next, take a light green circle and slightly overlap it with the red circle, then glue it down. Continue this pattern, overlapping and gluing each circle to form a wiggly, caterpillar-like body that stretches across the leaf.
- Add the Finishing Touches – A caterpillar isn’t complete without its features! Take your two wiggle eyes and glue them onto the red head circle. This instantly gives your craft personality. Next, it’s time to add the antennae. Cut two thin strips from the light green construction paper. Glue these strips to the top of the red head circle, pointing upwards. You can give them a little curl with your fingers before gluing them down for a more dynamic look.
- Display – Allow your piece to dry completely before you display it proudly for all to see!
RELATED —> Potato Masher Caterpillar Craft Idea
This Paper Plate Caterpillar craft is more than just a fun way to spend an afternoon. It’s an interactive experience that brings a beloved story to life.
By combining reading with a hands-on activity, you help reinforce the story’s themes and characters in a memorable way. It’s a fantastic project for parents, teachers, and anyone looking for a creative and educational activity for young children.
We hope you have a wonderful time creating your very own hungry caterpillar. Happy crafting, my friends!

Circle Punch Caterpillar Craft: A Playful DIY for Little Hands
Bring "The Very Hungry Caterpillar" to life with this easy paper plate craft for kids. Find our simple, step-by-step tutorial and start creating today!
Here’s your checklist of supplies to bring this craft to life:
- Large Green Paper Plate
- Red Cardstock Paper
- Light Green Cardstock Paper
- Embellishments
- Large Circle Craft Punch (about 1.5 to 2 inches)
Prepare your creative haven by laying down a protective cover before the crafting magic begins!
Directions:
- Create the Leaf - Your caterpillar needs a big, green leaf to rest on. Start by taking your large green paper plate. This will become the leaf for your caterpillar - no painting or coloring required! If you'd like, you can use a marker to add leaf veins for extra detail.
- Punch Out the Circles - Take your red and light green cardstock paper. Using your large circle craft punch, punch out several circles from each color. For the classic "Very Hungry Caterpillar" look, you will need one red circle for the head. For the body, punch out about five to seven circles, alternating between light green and another color if you wish.
- Assemble the Caterpillar's Body - Arrange the paper circles on the plate to see how you want your caterpillar to look. Start with the red circle for the head. Glue it down on one side of the paper plate. Next, take a light green circle and slightly overlap it with the red circle, then glue it down. Continue this pattern, overlapping and gluing each circle to form a wiggly, caterpillar-like body that stretches across the leaf.
- Add the Finishing Touches - A caterpillar isn't complete without its features! Take your two wiggle eyes and glue them onto the red head circle. This instantly gives your craft personality. Next, it's time to add the antennae. Cut two thin strips from the light green construction paper. Glue these strips to the top of the red head circle, pointing upwards. You can give them a little curl with your fingers before gluing them down for a more dynamic look.
- Display - Allow your piece to dry completely before you display it proudly for all to see!
CLICK HERE TO PRINT THE DIRECTIONS FOR THIS CRAFT
If you've enjoyed our content or have any thoughts to share, we'd love to hear from you! Mention @gluedtomycrafts or tag #gluedtomycrafts on Instagram!