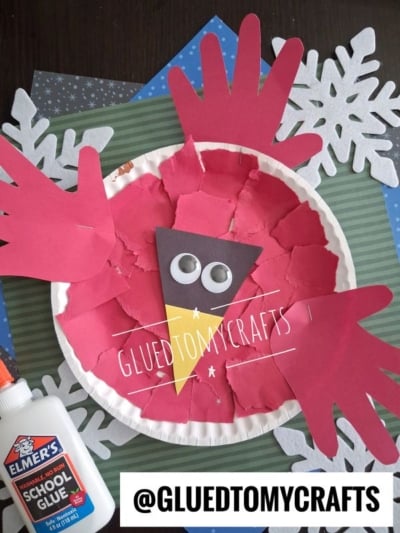
Few sights brighten a snowy morning like a red cardinal perched on a frosty branch. These cheerful birds stick around all winter long, so they’re the perfect inspiration for a cozy craft day with kids.
This paper plate cardinal is simple, playful, and full of personality. Little hands get to tear, glue, trace, and build, and the finished bird is sweet enough to hang on the fridge or pin to a classroom bulletin board. Best of all, you probably have most of the supplies on hand already.
Whether you’re planning a snow day activity at home or a winter bird unit in the classroom, this craft is a winner. Let’s get started!
Craft Supplies:
Gather these supplies before you begin:
- 1 white paper plate (a standard 9-inch plate works great)
- Red construction paper (2–3 sheets per cardinal)
- Black construction paper
- Yellow construction paper
- 2 googly eyes (larger eyes add extra charm)
- School glue, such as Elmer’s Washable School Glue
- Stapler
- Scissors
- Pencil, for tracing handprints
Directions:
Step 1: Tear the Red Paper Into Small Pieces
Hand your little crafter a sheet or two of red construction paper and let the tearing begin! Aim for pieces about the size of a postage stamp, roughly 1 inch across. They don’t need to be perfect. Uneven, ragged edges actually look more like fluffy feathers.
Tip: Set aside one full sheet of red paper for the handprints in Step 3 so it doesn’t end up in the tearing pile.
Step 2: Glue the Torn Paper Onto the Plate
Squeeze school glue onto the center of the paper plate and spread it around the inner circle. Then press the torn red pieces down, one by one, until the middle of the plate is covered.
Overlapping the pieces is encouraged, since it gives the bird a soft, feathery texture. Leave the ridged outer rim of the plate white for a clean border, or cover the whole thing for a bolder look.
Step 3: Trace and Cut the Handprints
Now for the most personal part! Have your child place one hand flat on the saved sheet of red construction paper with fingers spread slightly apart. Trace around the hand with a pencil.
You’ll need three handprints in total:
- Two for the wings, one for each side of the bird
- One for the crest, that famous pointy tuft on top of a cardinal’s head
Fold the paper in half, or stack two or three sheets, before cutting. This way you can cut several handprints at once. Older kids can handle the scissors themselves, while younger ones may need a grown-up to help with the tricky spaces between fingers.
Step 4: Create the Face and Beak
Every cardinal needs that striking black mask and bright yellow beak. Here’s how to make it:
- Cut a tall triangle from black construction paper, about 3 inches wide at the top and 4 inches long.
- Cut a smaller triangle from yellow construction paper for the beak.
- Glue the yellow triangle onto the bottom point of the black triangle so the beak points downward.
- Glue two googly eyes onto the black section, near the top.
That’s it! Your cardinal now has a face full of character.
Step 5: Assemble Your Cardinal
Time to bring it all together:
- Attach the face. Glue the triangle face piece to the center of the plate, with the beak pointing down.
- Add the wings. Place one handprint on the left edge of the plate and one on the right, with the fingers pointing outward. Staple each one to the rim of the plate.
- Add the crest. Staple the third handprint to the top of the plate with the fingers pointing up.
Staples hold the handprints firmly in place, which makes the craft sturdy enough for hanging. An adult should handle the stapler with younger kids. If you prefer, you can glue the handprints to the back of the plate instead.
Let everything dry for about 30 minutes before moving or hanging your bird.
RELATED —> Paper Plate Paint Splat Cardinal Craft
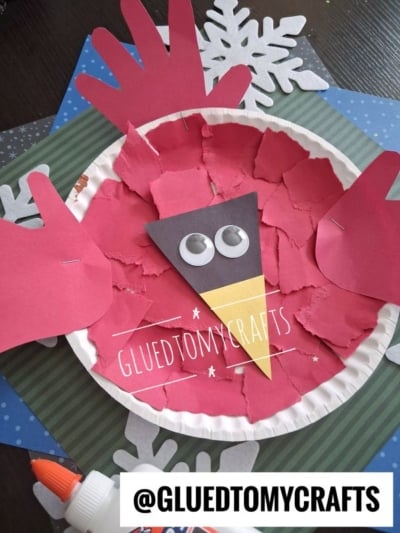

This paper plate cardinal craft is proof that the simplest supplies can lead to the happiest results. In under an hour, kids practice motor skills, explore color and texture, and create a cheerful winter bird they’ll be proud to show off.
So grab some paper plates, clear off the kitchen table, and let the tearing and gluing begin. Your little ones are about to make the cutest cardinals in the neighborhood. Happy crafting, my friends!