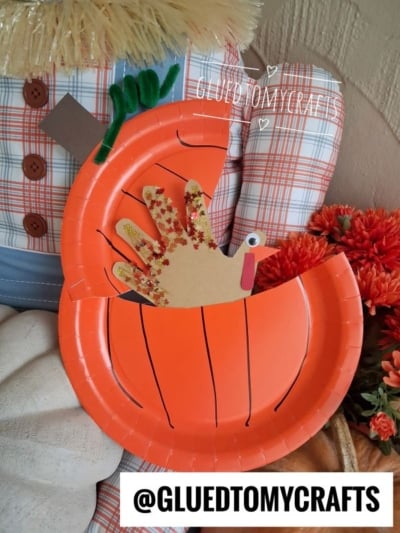
Kids go absolutely wild for a craft with a surprise built right in. This peek-a-boo turkey hides inside a cheerful orange pumpkin, and little ones love lifting the flap to find their feathered friend waiting inside. It is the perfect mix of two fall favorites: a classic paper plate pumpkin and a keepsake handprint turkey.
Best of all, this project uses simple supplies you probably already have in your craft bin. It works beautifully for a rainy afternoon at home, a Thanksgiving-themed lesson, or a busy day at daycare. The handprint captures your child’s size at this exact moment, so it doubles as a sweet memory you will want to save. Let’s make one together!
Craft Supplies:
- 1 orange paper plate
- Brown construction paper (for the handprint turkey)
- Black marker
- Brown cardstock (for the stem)
- Green pipe cleaner (for the vine)
- Googly eyes
- Orange and red paper scraps (for the beak and wattle)
- Gold glitter glue
- Fall-colored leaf sequins or metallic stickers
- Scissors
- Glue
Directions:
- Cut the pumpkin opening.Take your orange paper plate and cut it into two equal halves using a wavy, curved line across the middle. Then staple the two pieces back together on one side, leaving a slight opening between them in the center – this is the gap where your turkey will peek out. Adults should handle this step for younger crafters.
- Draw the pumpkin ridges. Using the black marker, draw a few vertical, slightly curved lines across the plate pieces. These lines mimic the ribs of a real pumpkin and instantly give your craft that classic pumpkin look. Kids can do this part themselves with a little guidance.
- Add the stem. Cut a small rectangle from your brown cardstock. Glue it to the top of the plate so it stands up like a stem. A slightly tapered shape at the top looks extra realistic.
- Twist and attach the vine. Wrap the green pipe cleaner around a pencil to create a fun spiral coil. Slide it off and glue or tuck it next to the stem so it curls out like a growing vine.
- Trace and cut the handprint turkey. Have your child spread their hand on the brown construction paper with fingers apart. Trace around it with the marker, then carefully cut out the handprint. The four fingers become the turkey’s tail feathers, and the thumb becomes its head and neck.
- Decorate the feathers. This is the fun, sparkly part! Add a line of gold glitter glue to each finger, then press on the fall-colored leaf sequins or metallic stickers. Mix red, orange, and yellow shades for a rich autumn feel. Let this dry for a few minutes.
- Assemble the turkey’s face. On the thumb (the head), glue on a googly eye. Cut a small orange triangle from your paper scraps for the beak and a red teardrop shape for the wattle. Glue both just below the eye. Now your turkey has personality!
- Tuck the turkey inside the pumpkin. Once everything is dry, slide the handprint turkey into the slit you cut in the plate. Position it so the decorated feathers and face peek out through the opening. Give the edges a dab of glue if you want to hold the turkey in place.
- And that’s it – your peek-a-boo turkey pumpkin is ready to display!
RELATED —> Potato Masher Apple Basket Craft for Kids
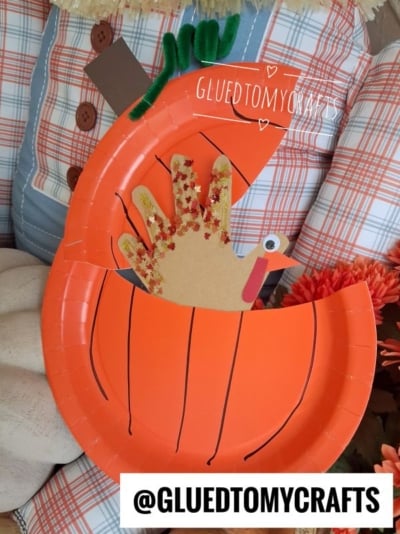
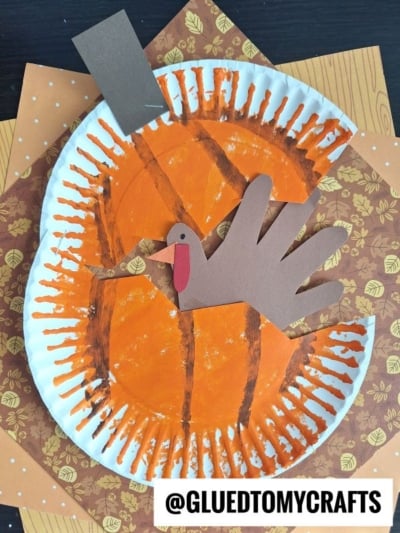
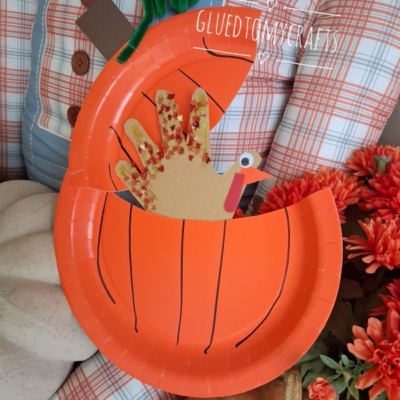
We can’t wait to see your little one’s handprint turkeys peeking out of their pumpkins. This is one of those projects that fills the fridge door with smiles all season long. Gather your supplies, roll up those sleeves, and enjoy the giggles when your child lifts the flap to find their turkey hiding inside.
Happy crafting from all of us at Glued To My Crafts – and don’t forget to snap a photo of your finished creation to share with us!

Paper Plate Peek-a-boo Turkey Craft Idea For Thanksgiving
Make an easy paper plate pumpkin with a peek-a-boo handprint turkey inside! A fun, simple Thanksgiving craft for kids that parents and teachers love.
Here’s your checklist of supplies to bring this craft to life:
- 1 Large Paper Plate
- Cardstock Paper
- Pipe Cleaner
- Embellishments
Prepare your creative haven by laying down a protective cover before the crafting magic begins!
Directions:
- Cut the pumpkin opening.Take your orange paper plate and cut it into two equal halves using a wavy, curved line across the middle. Then staple the two pieces back together on one side, leaving a slight opening between them in the center - this is the gap where your turkey will peek out. Adults should handle this step for younger crafters.
- Draw the pumpkin ridges. Using the black marker, draw a few vertical, slightly curved lines across the plate pieces. These lines mimic the ribs of a real pumpkin and instantly give your craft that classic pumpkin look. Kids can do this part themselves with a little guidance.
- Add the stem. Cut a small rectangle from your brown cardstock. Glue it to the top of the plate so it stands up like a stem. A slightly tapered shape at the top looks extra realistic.
- Twist and attach the vine. Wrap the green pipe cleaner around a pencil to create a fun spiral coil. Slide it off and glue or tuck it next to the stem so it curls out like a growing vine.
- Trace and cut the handprint turkey. Have your child spread their hand on the brown construction paper with fingers apart. Trace around it with the marker, then carefully cut out the handprint. The four fingers become the turkey's tail feathers, and the thumb becomes its head and neck.
- Decorate the feathers. This is the fun, sparkly part! Add a line of gold glitter glue to each finger, then press on the fall-colored leaf sequins or metallic stickers. Mix red, orange, and yellow shades for a rich autumn feel. Let this dry for a few minutes.
- Assemble the turkey's face. On the thumb (the head), glue on a googly eye. Cut a small orange triangle from your paper scraps for the beak and a red teardrop shape for the wattle. Glue both just below the eye. Now your turkey has personality!
- Tuck the turkey inside the pumpkin. Once everything is dry, slide the handprint turkey into the slit you cut in the plate. Position it so the decorated feathers and face peek out through the opening. Give the edges a dab of glue if you want to hold the turkey in place.
- And that's it - your peek-a-boo turkey pumpkin is ready to display!

Grab our favorite books via our Amazon affiliate link! In our Amazon storefront you will find books, toys and craft supplies we absolutely love using for our Glued To My Crafts tutorials!
If you've enjoyed our content or have any thoughts to share, we'd love to hear from you! Mention @gluedtomycrafts or tag #gluedtomycrafts on Instagram!