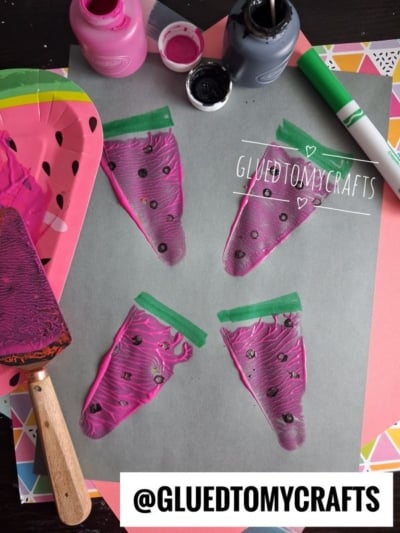
Summer is here, and that means it’s time to break out the paint, roll up those sleeves, and make something bright and juicy! If you’re hunting for a simple craft that little hands can pull off with a big smile, this one is a winner. We’re turning an ordinary kitchen tool into a stamp to make the cutest painted watermelon slices you’ve ever seen.
The best part? This project uses a cake server as a stamp, so kids get perfect triangle shapes every single time. No fussy cutting, no tricky drawing – just paint, press, and decorate. It’s messy in the best way, packs in some sneaky fine-motor practice, and looks adorable taped to the fridge afterward. Let’s get crafting!
Craft Supplies:
Gather these supplies before you begin. Most of them are probably already sitting in your craft bin or kitchen drawer.
- Grey construction paper – the perfect backdrop to make those pink slices pop
- Pink washable paint – Crayola works great and washes off little fingers easily
- Black paint – for the seeds
- Green marker – this becomes the watermelon rind
- Cotton swabs (Q-tips) – your seed-dotting tools
- A cake server – the star of the show and your triangle stamp
- A paper plate – used as a paint palette
That’s it! Simple supplies, big results.
Directions:
Follow these easy steps and you’ll have a page full of watermelon slices in no time.
- Cover your table with newspaper or a wipeable mat, because this one gets a little paint-happy. Lay out your grey construction paper and squeeze a generous blob of pink paint onto your paper plate. This plate is now your palette.
- Dip the flat triangular blade of the cake server into the pink paint. Wiggle it around in the paint until the whole surface is covered with a nice, thick layer. You want plenty of paint so the shape shows up clearly.
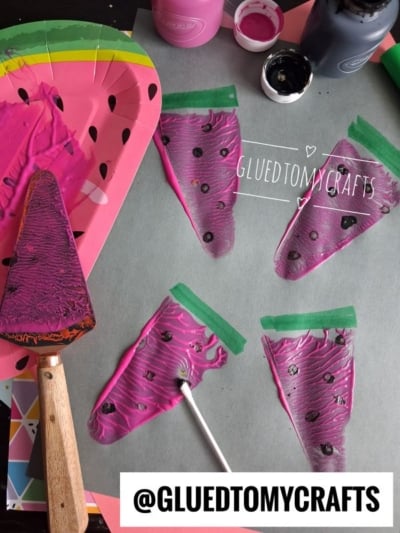
- Press the painted side of the cake server firmly down onto the grey paper, then lift it straight up. Ta-da – a perfect watermelon triangle! Repeat this a few times across the page to make a whole batch of slices. Re-coat the server with paint between each stamp for the boldest color.
- Once your pink triangles are stamped, it’s time for the rind. Take your marker and draw a thick rectangle shape on the flat top edge of each slice. This gives every watermelon that classic green crust look.
- Here comes the fun finishing touch. Dip a cotton swab into the black paint and dab little dots across each pink slice. These are your seeds! Let kids scatter them however they like – there’s no wrong way to seed a watermelon.
- Set your masterpiece aside to dry completely. The thick paint may take a little while, so find a safe spot away from curious hands and pets.
RELATED —> Coffee Filter Watermelon Craft Idea
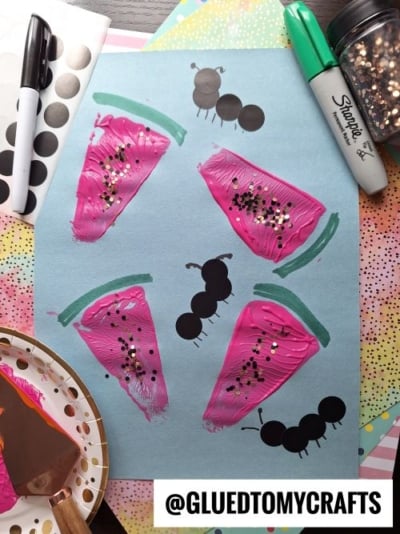
And just like that, you’ve got a page bursting with cheerful watermelon slices – perfect for summer decorating, a bulletin board, or a sweet handmade card. This craft proves that everyday items, like a humble cake server, can spark a whole lot of creative fun.
We’d love to see how yours turn out! Snap a photo of your little one’s juicy watermelon slices and share your creations. Happy crafting, and enjoy every colorful, paint-splattered minute of it!

Pie Server Stamped Watermelon Slice Craft Idea
Create fun watermelon art with a pie server stamped watermelon technique using simple supplies for bright, colorful results.
Here’s your checklist of supplies to bring this craft to life:
- Cardstock Paper
- Craft Paint
- Unused Q-Tips
- Embellishments
Prepare your creative haven by laying down a protective cover before the crafting magic begins!
Directions:
- Cover your table with newspaper or a wipeable mat, because this one gets a little paint-happy. Lay out your grey construction paper and squeeze a generous blob of pink paint onto your paper plate. This plate is now your palette.
- Dip the flat triangular blade of the cake server into the pink paint. Wiggle it around in the paint until the whole surface is covered with a nice, thick layer. You want plenty of paint so the shape shows up clearly.
- Press the painted side of the cake server firmly down onto the grey paper, then lift it straight up. Ta-da - a perfect watermelon triangle! Repeat this a few times across the page to make a whole batch of slices. Re-coat the server with paint between each stamp for the boldest color.
- Once your pink triangles are stamped, it's time for the rind. Take your marker and draw a thick rectangle shape on the flat top edge of each slice. This gives every watermelon that classic green crust look.
- Here comes the fun finishing touch. Dip a cotton swab into the black paint and dab little dots across each pink slice. These are your seeds! Let kids scatter them however they like - there's no wrong way to seed a watermelon.
- Set your masterpiece aside to dry completely. The thick paint may take a little while, so find a safe spot away from curious hands and pets.


Grab our favorite books via our Amazon affiliate link! In our Amazon storefront you will find books, toys and craft supplies we absolutely love using for our Glued To My Crafts tutorials!
If you've enjoyed our content or have any thoughts to share, we'd love to hear from you! Mention @gluedtomycrafts or tag #gluedtomycrafts on Instagram!