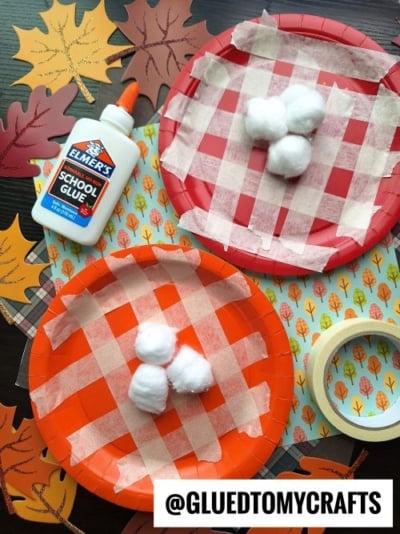
There’s something magical about crafting with kids when the weather turns cool and the leaves start to change. You pull out the supplies, spread everything across the table, and watch little imaginations take over. This paper plate pie craft, inspired by the clever creators at @GluedToCrafts, is one of those simple projects that keeps kids happy for ages while giving you an adorable fall decoration to hang on the fridge.
The best part? You probably already have everything you need at home. No fancy tools, no messy paint, and no complicated steps. Just paper plates, tape, and a few cotton balls transformed into cute little “pies” that look good enough to eat. Let’s make some!
Craft Supplies:
Gather these simple items before you start:
- Paper plates in fall colors – red for cherry pie and orange for pumpkin pie work perfectly. Feel free to add brown, yellow, or tan for extra variety.
- Painter’s tape or masking tape – the off-white color looks just like a golden pie crust.
- Cotton balls – these become fluffy dollops of whipped cream on top.
- Elmer’s liquid school glue – for sticking those cotton balls in place.
That’s it! Four everyday supplies and you’re ready to bake up some paper pies.
Directions:
Follow these easy steps and you’ll have a finished pie in just a few minutes.
- Give each child a paper plate. Talk about what kind of pie they want to make. A red plate becomes a cherry pie, while an orange plate turns into a pumpkin pie. Let them pick their favorite and get excited about the flavor.
- Help your little ones tear off strips of painter’s tape. You’ll want the strips roughly the width of the plate. Don’t worry about making them perfect. Uneven, torn edges actually make the crust look more homemade and charming. Tear a small pile so you have plenty ready to go.
- Place the tape strips across the plate in one direction, spacing them evenly apart. For a fuller lattice, use four or five strips running vertically. Press each one down firmly so it sticks. This is your first set of “crust” strips.
- Now for the fun part. Take your next strips and lay them across the plate in the opposite direction, going over and under the first set to create that classic woven lattice crust. Older kids will love figuring out the over-under pattern, and it looks impressive when finished. If weaving feels tricky, simply crisscrossing the strips into a grid works just as well and still looks adorable.
- Once your crust is done, it’s time for the finishing touch. Squeeze a small dot of school glue in the center of the plate, then press one or two cotton balls right on top. Gently pull the cotton balls apart a little so they look fluffy, just like a real dollop of whipped cream.
- Set your pie aside to let the glue dry completely. Then hang it up, prop it on a shelf, or add it to a pretend bakery play set. Your kids will be so proud to show off their creations.
RELATED —> Torn Paper Pumpkin Pie for Little Hands
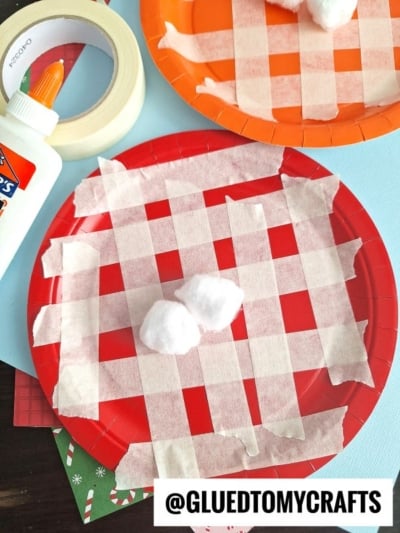

This painter’s tape pie craft proves that the simplest projects often bring the biggest smiles. With just a few supplies and a little imagination, your kids can whip up a whole table of pretend pies while building skills and making memories along the way.
So grab those paper plates, pull out the tape, and let the fall crafting fun begin. We’d love to see the delicious little pies your family creates. Happy crafting, my friends!

Paper Plate and Masking Tape Pie Craft Idea
Turn paper plates and masking tape into adorable pumpkin and cherry pies. A budget-friendly fall kids craft parents and teachers will love. Learn how!
Here’s your checklist of supplies to bring this craft to life:
- Painter's Tape
- Large Paper Plate
- Cotton Balls
- Embellishments
- School Glue
Prepare your creative haven by laying down a protective cover before the crafting magic begins!
Directions:
- Give each child a paper plate. Talk about what kind of pie they want to make. A red plate becomes a cherry pie, while an orange plate turns into a pumpkin pie. Let them pick their favorite and get excited about the flavor.
- Help your little ones tear off strips of painter's tape. You'll want the strips roughly the width of the plate. Don't worry about making them perfect. Uneven, torn edges actually make the crust look more homemade and charming. Tear a small pile so you have plenty ready to go.
- Place the tape strips across the plate in one direction, spacing them evenly apart. For a fuller lattice, use four or five strips running vertically. Press each one down firmly so it sticks. This is your first set of "crust" strips.
- Now for the fun part. Take your next strips and lay them across the plate in the opposite direction, going over and under the first set to create that classic woven lattice crust. Older kids will love figuring out the over-under pattern, and it looks impressive when finished. If weaving feels tricky, simply crisscrossing the strips into a grid works just as well and still looks adorable.
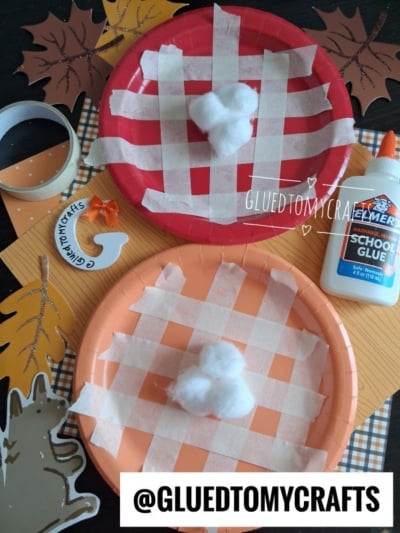
- Once your crust is done, it's time for the finishing touch. Squeeze a small dot of school glue in the center of the plate, then press one or two cotton balls right on top. Gently pull the cotton balls apart a little so they look fluffy, just like a real dollop of whipped cream.
- Set your pie aside to let the glue dry completely. Then hang it up, prop it on a shelf, or add it to a pretend bakery play set. Your kids will be so proud to show off their creations.

Grab our favorite books via our Amazon affiliate link! In our Amazon storefront you will find books, toys and craft supplies we absolutely love using for our Glued To My Crafts tutorials!
If you've enjoyed our content or have any thoughts to share, we'd love to hear from you! Mention @gluedtomycrafts or tag #gluedtomycrafts on Instagram!