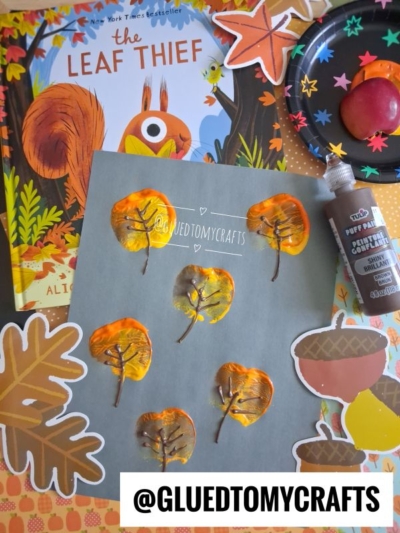
There’s something magical about crisp autumn days, cozy sweaters, and the crunch of colorful leaves underfoot. If you’re looking for a simple way to bring that seasonal joy indoors, this apple-stamped fall leaves craft is about to become your new favorite.
It’s messy in the best way, wildly fun for little hands, and the finished art looks stunning on the fridge or classroom wall. So on that note, grab a couple of apples and let’s make some autumn magic together!
Craft Supplies:
Gather these simple supplies before you begin:
- Gray cardstock — the perfect moody backdrop for bright fall colors
- Apples cut in half — one apple makes two stamps, so slice them right down the middle
- Orange and yellow paint — washable is your friend here
- A paper plate — for holding and mixing your paint
- Tulip Shiny Brown Puff Paint — to give the leaves dimension
That’s it! Most of these items are probably already hiding in your kitchen or craft drawer.
Directions:
- Cover your table with newspaper or a wipeable mat. Paint plus kids equals joyful chaos, so protect your surfaces first. Roll up those sleeves and get everyone ready.
- Squeeze a puddle of orange and a puddle of yellow onto the paper plate. Keep them close together but not fully mixed. When kids dip their apple, the two colors will blend naturally and give each stamp that gorgeous marbled autumn look.
- Hand your child an apple half, flat side down. Press it gently into the paint, then stamp it firmly onto the gray cardstock. Lift straight up for a crisp print. Repeat across the paper to make several round leaf shapes. Six looks great, but there are no rules here!
- This is the tricky part for eager little artists. Set the paper aside and let the paint dry completely. A snack break or a story is the perfect way to pass the time.
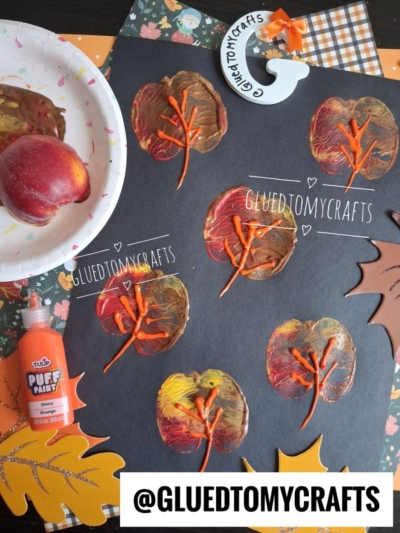
- Once the stamped shapes are dry, it’s puff paint time. Using the Tulip Shiny Brown Puff Paint, draw a line coming up from the bottom of each stamped circle, then add a few more lines coming out of it, to create the “veins” in the leaf. The puff paint sits raised on the paper, so your leaves will have a fun, touchable texture.
- Let the puff paint set fully. It puffs up as it dries and turns glossy, giving your autumn leaves a beautiful finished look. Then hang your autumn masterpiece somewhere everyone can admire it!
RELATED —> Pom Pom Stamped Fall Sweater Craft Idea
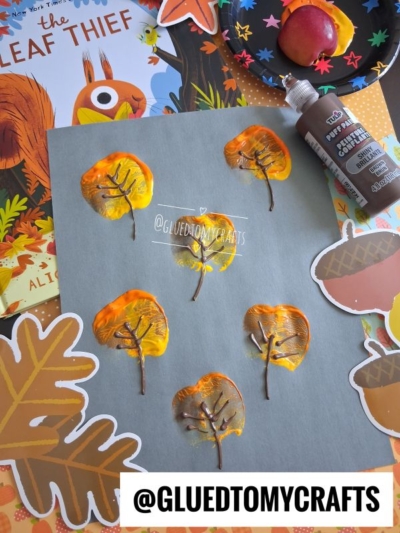
GRAB THE LEAF THIEF BOOK VIA OUR AMAZON AFFILIATE LINK
This craft is proof that the simplest supplies often spark the biggest smiles. Whether you’re crafting at the kitchen table or setting up a classroom station, apple-stamped fall trees deliver color, creativity, and plenty of giggles.
So grab those apples, break out the paint, and enjoy a little autumn fun with your favorite young artists. Happy crafting, my friends!

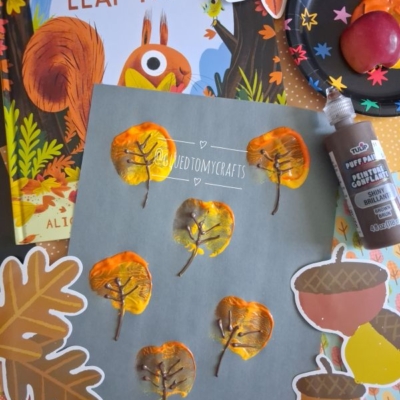
Apple Stamped Fall Leaves For Autumn
Apple stamped fall leaves make an easy autumn craft for kids! Stamp trees with paint and puff paint, paired with The Leaf Thief. Get the full tutorial.
Here’s your checklist of supplies to bring this craft to life:
- Cardstock Paper
- Craft Paint
- Large Apple
- Embellishments
Prepare your creative haven by laying down a protective cover before the crafting magic begins!
Directions:
- Cover your table with newspaper or a wipeable mat. Paint plus kids equals joyful chaos, so protect your surfaces first. Roll up those sleeves and get everyone ready.
- Squeeze a puddle of orange and a puddle of yellow onto the paper plate. Keep them close together but not fully mixed. When kids dip their apple, the two colors will blend naturally and give each stamp that gorgeous marbled autumn look.
- Hand your child an apple half, flat side down. Press it gently into the paint, then stamp it firmly onto the gray cardstock. Lift straight up for a crisp print. Repeat across the paper to make several round leaf shapes. Six looks great, but there are no rules here!
- This is the tricky part for eager little artists. Set the paper aside and let the paint dry completely. A snack break or a story is the perfect way to pass the time.
- Once the stamped shapes are dry, it's puff paint time. Using the Tulip Shiny Brown Puff Paint, draw a line coming up from the bottom of each stamped circle, then add a few more lines coming out of it, to create the "veins" in the leaf. The puff paint sits raised on the paper, so your leaves will have a fun, touchable texture.
- Let the puff paint set fully. It puffs up as it dries and turns glossy, giving your autumn leaves a beautiful finished look. Then hang your autumn masterpiece somewhere everyone can admire it!


Grab our favorite books via our Amazon affiliate link! In our Amazon storefront you will find books, toys and craft supplies we absolutely love using for our Glued To My Crafts tutorials!
If you've enjoyed our content or have any thoughts to share, we'd love to hear from you! Mention @gluedtomycrafts or tag #gluedtomycrafts on Instagram!