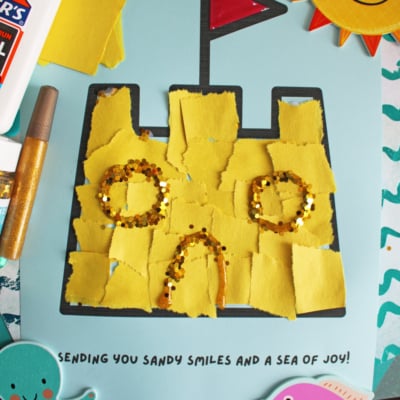
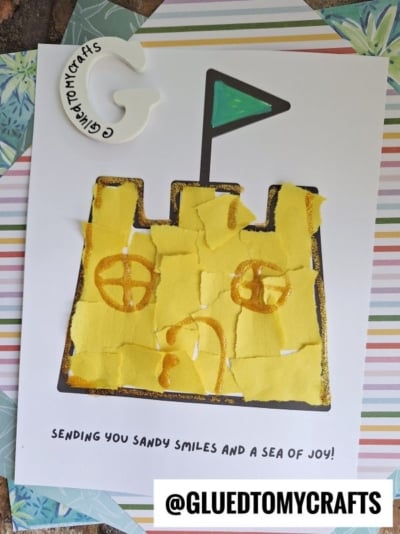
Create a torn paper sand castle with simple supplies. Follow easy steps for a fun beachy craft project today!
Bring the magic of the beach right to your kitchen table! Building sandcastles is a classic summer activity, but you don’t need to pack up the car and drive to the shore to enjoy it.
This torn paper sand castle craft is a wonderful way for kids to get creative while working on their fine motor skills.
Tearing paper strengthens the small muscles in children’s hands, making this activity both fun and beneficial.
Craft Supplies:
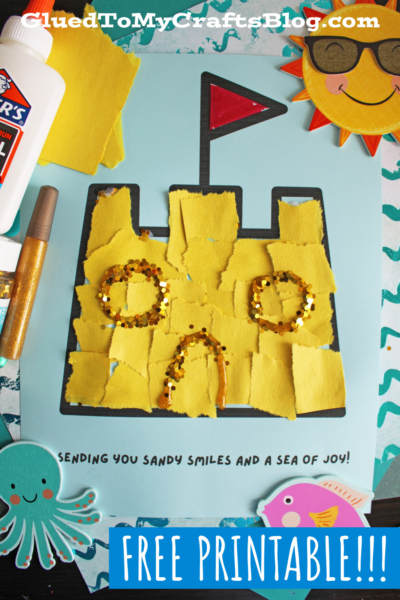
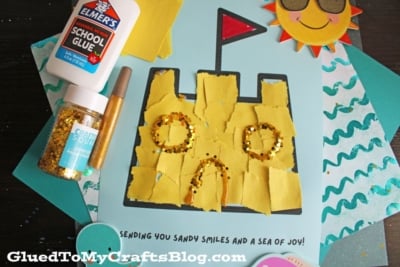
You only need a few basic craft supplies to bring these coastal creations to life:
- Blue cardstock paper: For the sky and ocean background.
- Yellow construction paper: To act as the “sand” for the castle.
- Free Sand Castle Printable: grab it from our landing page
- School glue: Perfect for little hands to manage without making a mess.
- Glitter glue and loose craft glitter: To draw windows, doors, and drawbridges.
- Embellishments
Directions:
Follow these easy steps to create your own beachy sand castle on paper today!
- First, prepare a clean and organized workspace. Lay out all your materials so the kids can easily access everything. This makes the torn paper activity more manageable, especially if you’re working with a group.
- Start by downloading or creating your “sending you sandy smiles” printable. Print it onto a single sheet of light blue cardstock. This will serve as the base for your craft.
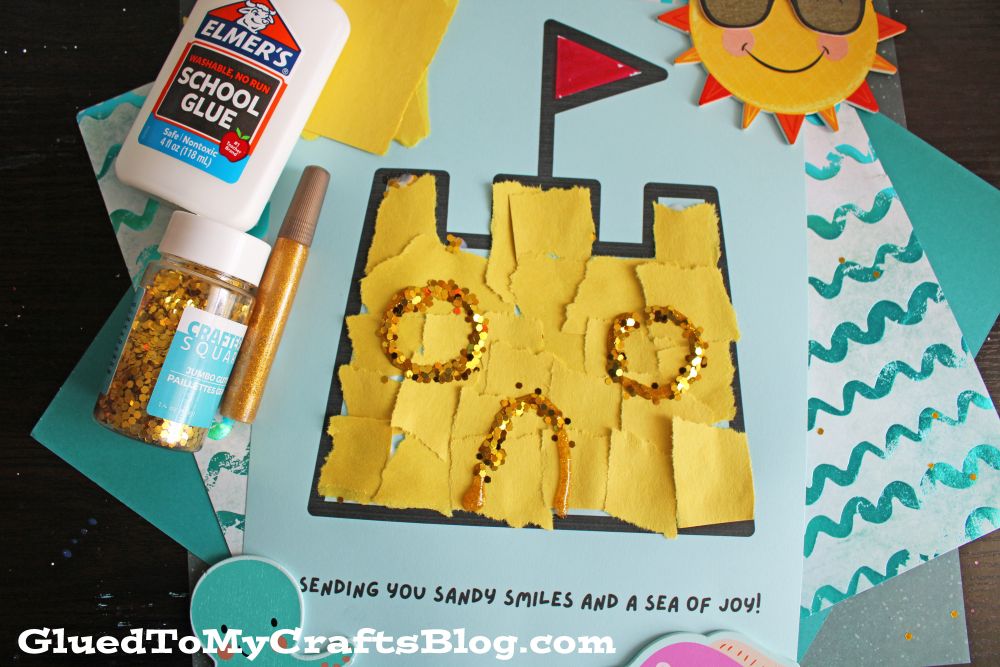
- Next up – help your child tear their sheet of yellow construction paper into small pieces. The pieces don’t need to be perfect. This step is great for building fine motor skills.
- Using school glue, have your child carefully glue the ripped yellow paper pieces inside the “castle” outline on the printable. Encourage them to fill the space and enjoy the process. Remind them that the goal isn’t perfection – it’s about having fun and creating something unique!
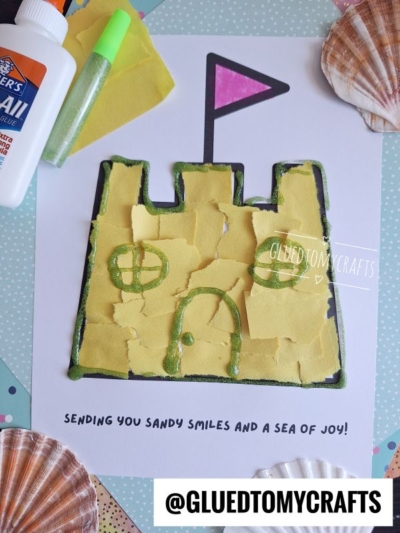
- Optional step – use glitter glue and loose craft glitter to draw on doors & windows on your castle design.
- When done decorating, allow the glue to dry completely before handling the craft. This ensures everything stays in place and looks its best.
RELATED —> Paper Plate Mermaid House Craft
We hope you and your little ones have a wonderful time creating these torn paper masterpieces. Hang them on the fridge or send them to a loved one to share those bright, beachy vibes! Happy crafting, my friends!

Torn Paper Sand Castle Craft Idea For Summer
Create a torn paper sand castle with simple supplies. Follow easy steps for a fun beachy craft project today!
Here’s your checklist of supplies to bring this craft to life:
- School Glue
Prepare your creative haven by laying down a protective cover before the crafting magic begins!
Directions:
- First, prepare a clean and organized workspace. Lay out all your materials so the kids can easily access everything. This makes the torn paper activity more manageable, especially if you’re working with a group.
- Start by downloading or creating your "sending you sandy smiles" printable. Print it onto a single sheet of light blue cardstock. This will serve as the base for your craft.
- Next up - help your child tear their sheet of yellow construction paper into small pieces. The pieces don’t need to be perfect. This step is great for building fine motor skills.
- Using school glue, have your child carefully glue the ripped yellow paper pieces inside the "castle" outline on the printable. Encourage them to fill the space and enjoy the process. Remind them that the goal isn’t perfection - it’s about having fun and creating something unique!
- Optional step - use glitter glue and loose craft glitter to draw on doors & windows on your castle design.
- When done decorating, allow the glue to dry completely before handling the craft. This ensures everything stays in place and looks its best.


NEED MORE HELP DOWNLOADING OUR FREE PRINTABLES? PLEASE REFER TO OUR FAQ PAGE
If you've enjoyed our content or have any thoughts to share, we'd love to hear from you! Mention @gluedtomycrafts or tag #gluedtomycrafts on Instagram!