Glued To My Crafts

Join thousands of others who have gotten GLUED to our craft tutorials!

  • Home
  • Safety Guidelines
  • Seasonal Themes
    • New Years
    • Valentine’s Day
    • St. Patrick’s Day
    • Spring
    • Easter
    • Mother’s Day
    • Summer
    • Father’s Day
    • Patriotic
    • Halloween
    • Thanksgiving
    • Fall
    • Winter
    • Christmas
    • Snowmen
    • Story Time
  • About Us
  • Amazon Storefront
  • Monthly Themes
    • January Craft Ideas
    • February Craft Ideas
    • March Craft Ideas
    • April Craft Ideas
    • May Craft Ideas
    • June Craft Ideas
    • July Craft Ideas
    • August Craft Ideas
    • September Crafts
    • October Crafts
    • November Crafts
    • December Crafts
  • Collection Posts
    • 20+ Creative Paper Bag Craft Ideas for Kids to Enjoy Today
    • 20+ Plastic Egg Stamp Crafts for Spring Fun
    • 50+ Creative Thumbprint Craft Ideas for Spring Fun
    • Craft Ideas for Kids Using Egg Stickers
    • Thumbs Up! 50+ Creative Thumbprint Crafts for Kids
    • 40+ Insect Craft Ideas For Kids
    • 50+ Craft Ideas For Kids Using A Plastic Fork As A Paint Brush
    • 30+ Puffy Paint Craft Ideas For Kids To Try Today!
    • 20+ Fun and Easy Paper Bowl Crafts for Kids
    • Pete The Cat Craft Ideas: Fun & Easy Projects for Kids
    • Transform Coffee Filters into 40+ Stunning DIY Projects
    • Transform Crepe Paper Streamers into 60+ Stunning Crafts
    • Pie Server Stamped Craft Ideas Kids Will Adore
    • Paint Splat Pie Craft Idea For Kids

Paint Splat Melted Ice Cream Cone Craft Idea For Summer

When engaging in craft activities, it is important for young children to have adult supervision at ALL times. It is also recommended to use supplies that are suitable for your child's age. Feel free to modify materials or steps to meet your specific requirements. Please refer to our safety guidelines for more information.

As an Amazon Associate I earn from qualifying purchases. This post may contain affiliate links. For more information, please see our disclosure policy.

UPDATE FOR 2026 - To reduce storage costs and download fees, we recently made some changes to our website. The password for all our files this year is GLUEDTOMYCRAFTS2026. No sign-up is required to download our free printables! You can enjoy our printables without creating an account or paying for Box.com. Simply follow the download instructions on our FAQ PAGE.

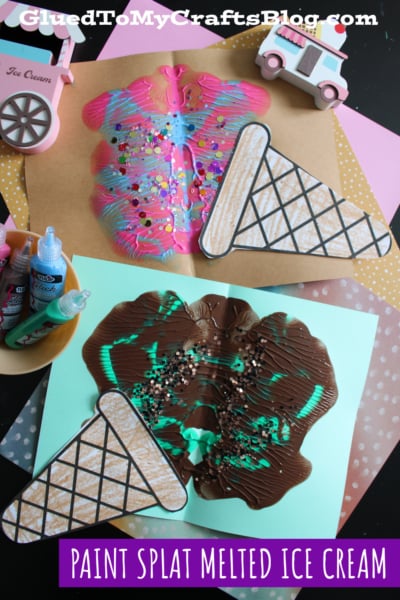
Two colorful paint splat artworks shaped like melted ice cream, each with a paper cone, are displayed on colored paper. Craft supplies and ice cream-themed decorations are arranged around them.

Grab your art supplies and prepare for some gloriously messy creativity from Glued To My Crafts! We are making a Paint Splat Melted Ice Cream Cone, and it is just as fun as it sounds.

This craft combines the joy of unpredictable paint splatters with the sweet, nostalgic shape of a dropped summer treat. It is an excellent weekend project for kids, a relaxing creative outlet during the summer months, and a fantastic way to play with vibrant colors!
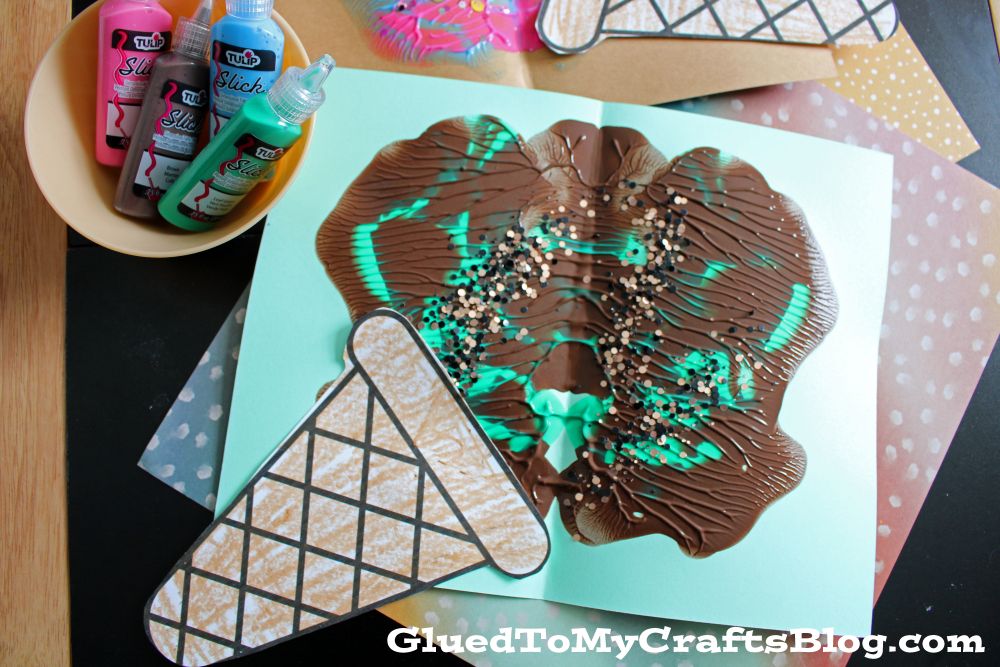
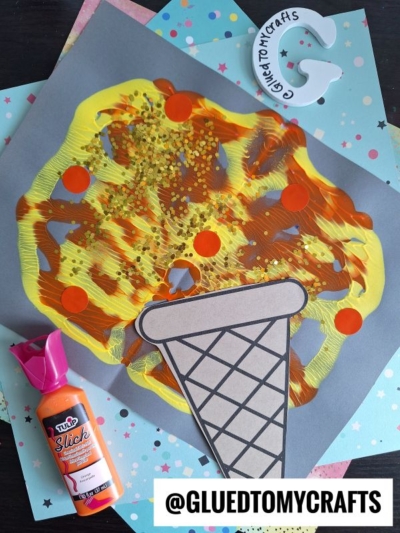
A children’s craft project features an ice cream cone made from paper and painted with swirls of brown, turquoise, and sprinkles. Puffy paint bottles and another similar craft are nearby on a black and polka dot surface.

Create a fun paint splat melted ice cream design with simple supplies. Try this unique craft technique today!

Craft Supplies:

Before the paint starts flying, gather these simple supplies:

  • Ice Cream Cone Printable – password – GLUEDTOMYCRAFTS2026
  • White Cardstock Paper
  • Crayons, Coloring Pencils, Markers etc.
  • Paper Scissors
  • Cardstock Paper {choice of color}
  • Tulip Puffy Paint {two different colors}
  • School Glue
  • Embellishments

Directions:

  1. First print the free “ice cream cone” printable listed above.
  2. Next go ahead and color in ONE of the cone designs in the printable, however you like. Trim it out.
  3. Now grab your second sheet of cardstock paper.
  4. Fold it in half {either direction works!}
  5. Place a few drops of the craft paint on one side of the folded paper, as well as the center along the fold line.
  6. Fold the paper again and gently press down, spreading the paint from the center outwards. This is a fun “splat” technique that creates a unique and symmetrical “melted ice cream” design.
  7. Unfold the paper to reveal your melted design. You can add a little glitter to the wet paint for some sparkle. Set it aside to dry completely.
  8. To finish the Paint Splat Melted Ice Cream Cone craft – add the “cone” cutout wherever you like on the finished design. Add any other embellishments you see fit.
  9. When you are done crafting, allow it to dry completely and display it proudly for all to see!

Tips for Customization:

Make this melted ice cream craft completely your own with a few fun tweaks:

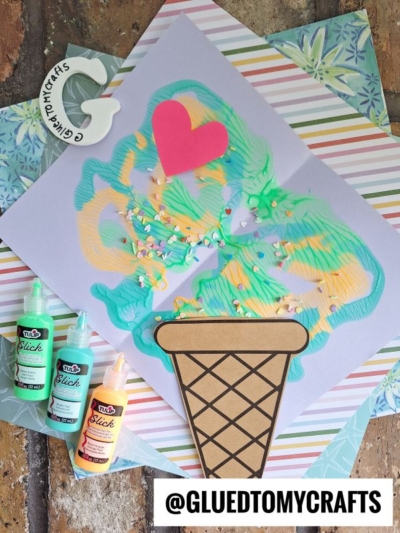
  • Mix up the flavors: Use mint green with tiny black paper dots for chocolate chip, or swirl pink and blue together for cotton candy.
  • Add texture: add white cotton balls on top of the wet paint, for a three-dimensional melted effect.
  • Double scoop: Create two smaller splats side-by-side or overlapping to make a massive dropped sundae.
  • Add toppings: Glue on tiny beads, sequins, or pieces of colored paper to look like sprinkles, nuts, or chocolate chips.
  • Seasonal vibes: Use autumn colors and leaf-shaped confetti for a fall look, or pastel shades with paper flowers for spring.

RELATED —> Cotton Ball & Paper Plate Ice Cream Cone
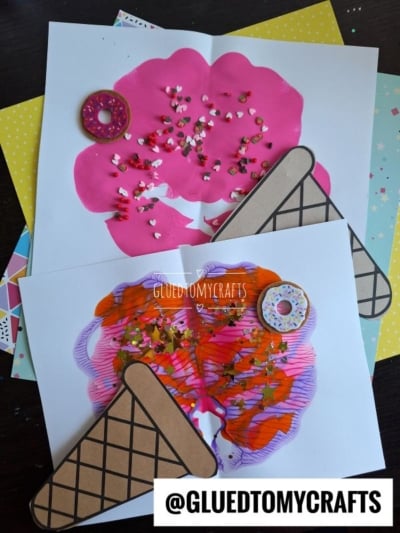
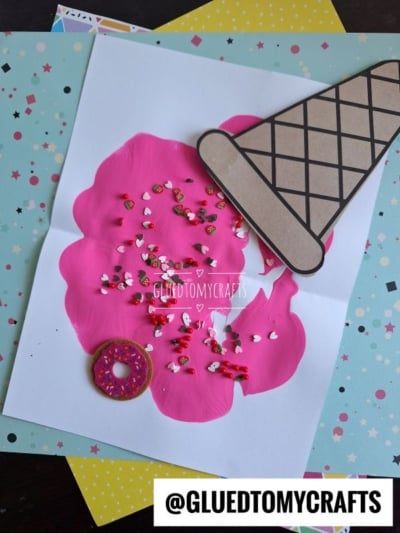
Two pieces of paper display colorful ice cream cone art made with paint and sprinkles. One has a melted ice cream effect with pink paint; the other features pink and orange swirls. Both have paper cone cutouts and are decorated with fake donuts. A handmade card features a large pink scoop of melted ice cream painted on white paper, topped with colorful sprinkles, a brown paper cone, and a small donut sticker. Decorative papers and playful paint splats are scattered underneath.

Now it is your turn to get messy and creative. Gather your favorite colors, clear off the kitchen table, and see what kind of delicious disasters you can create!

Remember, there are no mistakes in art – just happy splatters and joyful experimenting. Let your imagination run wild, and let each creation remind you that creativity is all about having fun. So, squeeze out those paints, make a little mess, and enjoy every bright, whimsical moment. Happy crafting, my friends!

Stacey Glued To My Crafts website signature

Craft Activity Safety Guidelines:

Always Ensure Adult Supervision - Young children should be supervised at all times when engaging in craft activities. This is essential to keep them safe and ensure materials are used correctly. Use Age-Appropriate Supplies - Choose craft supplies that are suitable for your child’s age. Check labels for recommendations and avoid items with small parts or sharp edges for younger children. Modify as Needed - Feel free to adapt materials or steps to meet your child's abilities and safety needs. For example, substitute scissors with safety scissors if necessary. Keep an Eye on Allergies - Be mindful of potential allergens in craft materials like glue, paint, or certain fabrics. Opt for non-toxic and hypoallergenic options whenever possible. Organize and Secure Supplies - Keep all craft tools and materials organized. Store sharp objects, small parts, and potentially hazardous items out of reach when not in use. Following these guidelines will ensure that crafts remain fun, creative, and, most importantly, safe for everyone involved!


OUR PRIVACY POLICY

OUR COPYRIGHT POLICY

  • Email
  • Facebook
  • Instagram
  • Pinterest
  • Twitter
  • YouTube

LOOKING FOR SOMETHING?

EXPLORE OUR SITE:

© 2012–2026 Glued To My Crafts
All activities should be supervised by an adult at all times. Please refer to our safety guidelines for more information.


Please note that all the content of the website, including printables, are for classroom and personal use only. This means that any digital item you download from our site can be used for non-commercial use only. We kindly request that you do not reproduce or sell our creations. We appreciate your understanding and cooperation in respecting our content and intellectual property rights.

Accessibility Adjustments

Powered by OneTap

How long do you want to hide the toolbar?
Hide Toolbar Duration
Select your accessibility profile
Vision Impaired Mode
Enhances website's visuals
Seizure Safe Profile
Clear flashes & reduces color
ADHD Friendly Mode
Focused browsing, distraction-free
Blindness Mode
Reduces distractions, improves focus
Epilepsy Safe Mode
Dims colors and stops blinking
Content Modules
Font Size

Default

Line Height

Default

Color Modules
Orientation Modules