Spring is in the air, and what better way to celebrate the season of renewal than with a fun and creative craft project? This Paper Plate & Paint Splat Cherry Blossom Tree Craft is the perfect activity to bring the beauty of blooming cherry blossoms indoors.
With just a few simple supplies and a splash of creativity, you and your little ones can create stunning, one-of-a-kind trees that capture the magic of spring.

Whether you’re looking for a rainy-day activity or a classroom project, this craft is sure to delight and inspire!
Craft Supplies:
- Large White Paper Plates – 1 per craft
- Brown Cardstock Paper
- Craft Scissors
- Two Different Shades of Pink Craft Paint
- White and Pink Dot Stickers
- Stapler
- Baby Wipes
- Embellishments
Directions:
-
Prepare Your Workspace:
Make sure you have a good working area that can get messy because paint will likely squeeze out of the sides during this craft! -
Fold the Paper Plate:
Take one paper plate and fold it in half. This will be the base for your cherry blossom tree. -
Add the Paint:
Unfold the plate and squirt some pink paint on one side of the paper plate. Be sure to keep the paint inside the plate and avoid using too much. -
Create the Paint Splat:
Fold the paper plate back in half, sandwiching the paint inside. Gently press and rub your hand all over the folded plate to spread the paint evenly. Be mindful of paint squeezing out the sides – keep baby wipes handy for quick cleanup! -
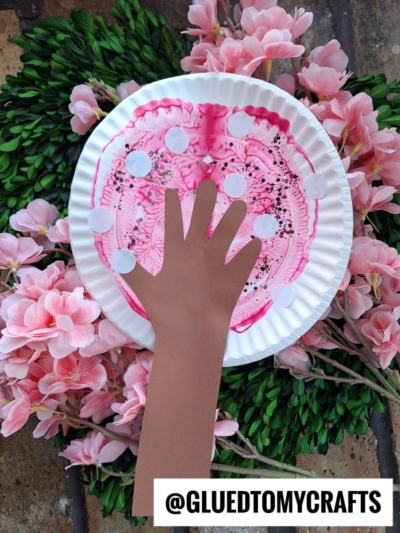
Reveal the Design:
Carefully unfold the plate to reveal your beautiful cherry blossom-inspired paint splatter design. It should resemble the blooming branches of a tree. -
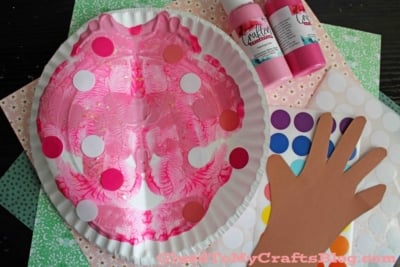
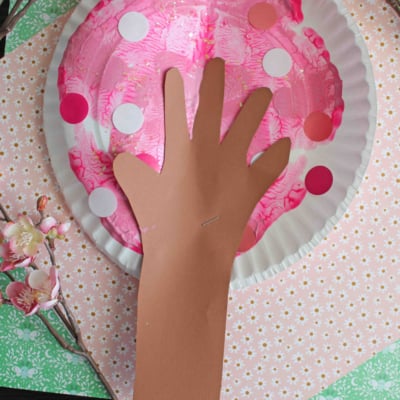
Add the Tree Trunk:
Cut a tree trunk shape out of the brown cardstock paper. Staple or glue it to the center of the paper plate, aligning it with the bottom edge to complete the tree. -
Decorate Your Tree:
Add the dot stickers to make “blossoms” on the tree. If you’d like, sprinkle glitter on the wet paint for a sparkly effect or add other embellishments to make it uniquely yours. -
Let It Dry:
Set your cherry blossom tree craft aside to dry completely before displaying it proudly.
RELATED —> Popsicle Stick Cherry Blossom Tree Branch Craft Idea
And there you have it – your very own Paper Plate & Paint Splat Cherry Blossom Tree! This craft is not only a wonderful way to welcome spring but also a great opportunity to let your creativity blossom. Display your masterpiece proudly or gift it to someone special to brighten their day.
Don’t forget to experiment with colors, glitter, and embellishments to make each tree uniquely yours. Happy crafting, and may your spring be as colorful and joyful as your cherry blossom creations! 🌸

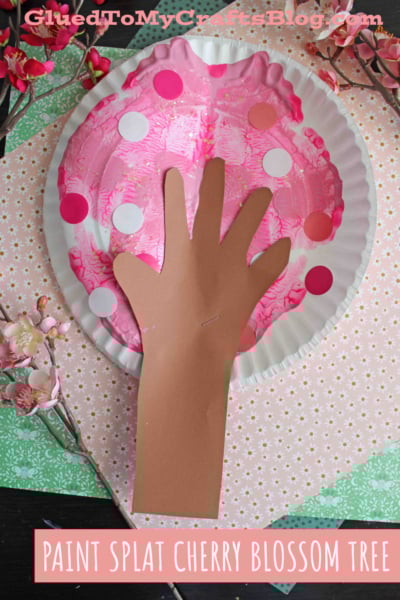
Paint Splat Cherry Blossom Tree Craft Idea For Spring
Here’s your checklist of supplies to bring this craft to life:
Prepare your creative haven by laying down a protective cover before the crafting magic begins!
Directions:
- Prepare Your Workspace: Make sure you have a good working area that can get messy because paint will likely squeeze out of the sides during this craft!
- Fold the Paper Plate: Take one paper plate and fold it in half. This will be the base for your cherry blossom tree.
- Add the Paint: Unfold the plate and squirt some pink paint on one side of the paper plate. Be sure to keep the paint inside the plate and avoid using too much.
- Create the Paint Splat: Fold the paper plate back in half, sandwiching the paint inside. Gently press and rub your hand all over the folded plate to spread the paint evenly. Be mindful of paint squeezing out the sides - keep baby wipes handy for quick cleanup!
- Reveal the Design: Carefully unfold the plate to reveal your beautiful cherry blossom-inspired paint splatter design. It should resemble the blooming branches of a tree.
- Add the Tree Trunk: Cut a tree trunk shape out of the brown cardstock paper. Staple or glue it to the center of the paper plate, aligning it with the bottom edge to complete the tree.
- Decorate Your Tree: Add the dot stickers to make "blossoms" on the tree. If you’d like, sprinkle glitter on the wet paint for a sparkly effect or add other embellishments to make it uniquely yours.
- Let It Dry: Set your cherry blossom tree craft aside to dry completely before displaying it proudly.