Create a fun paper plate gumball machine with simple materials. Follow this guide for a colorful craft project!


Are you searching for a fun, creative, and budget-friendly craft activity to enjoy with your kids today? Look no further than today’s “paper plate gumball machine” tutorial!
This colorful and engaging project uses simple materials and our free printable to bring a little bit of whimsy into your home.

In this guide, we’ll walk you through the steps to help your kids design their very own gumball machine using paper plates and coding dots. It’s not just an easy and entertaining craft—it’s also a fantastic opportunity to bond and spark their creativity. Let’s get crafting!
Craft Supplies:
Before starting, ensure you have the following materials ready. Most items are likely already in your home or can easily be found at a local craft store.
- Large Paper Plate
- Gumball Machine Printable – from our landing page
- White Cardstock Paper
- Craft Scissors
- Markers/Crayons
- Stapler
- Rainbow Coloring Dots {affiliate link on Amazon}
- Embellishments
Directions:
- First things first – grab your printout.
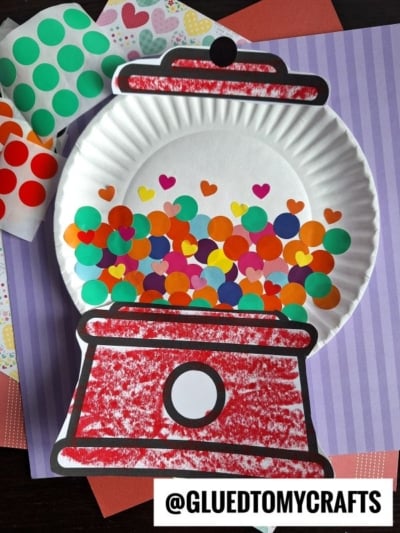
- Use markers or crayons to color in the gumball machine design.
- Use scissors to trim both pieces out. Discard excess paper.
- Next grab your paper plate and coding labels.
- Cover the paper plate in dots. No rhythm or reason to it – just add as many “gumballs” to the center of the plate.
- Finally, the last step is to staple the two paper plates {top and bottom} to the decorated paper plate piece.
- Your paper plate gumball machine is complete! Whether you hang it on the fridge, display it on a shelf, or gift it to a loved one, it’s sure to bring smiles all around.
RELATED —> Valentine’s Day Gumball Machine Photo Ornament
Recreating today’s “paper plate gumball machine” tutorial is a simple yet imaginative way for kids to enjoy crafting, learn new skills, and express their creativity. With just a few supplies and a few guided steps, this activity will keep kids engaged while producing a one-of-a-kind piece they’ll be proud of.
On that note, it’s time to gather your materials and start crafting—get ready for some colorful fun! Happy crafting, my friends!

Paper Plate Gumball Machine Craft
Create a fun paper plate gumball machine with simple materials. Follow this guide for a colorful craft project!
Here’s your checklist of supplies to bring this craft to life:
Prepare your creative haven by laying down a protective cover before the crafting magic begins!
Directions:
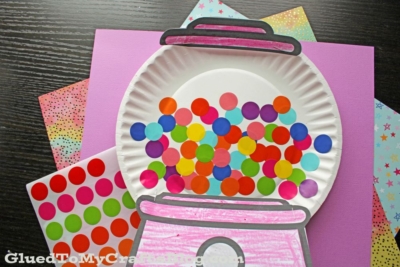
- First things first - grab your printout.
- Use markers or crayons to color in the gumball machine design.
- Use scissors to trim both pieces out. Discard excess paper.
- Next grab your paper plate and coding labels.
- Cover the paper plate in dots. No rhythm or reason to it - just add as many "gumballs" to the center of the plate.
- Finally, the last step is to staple the two paper plates {top and bottom} to the decorated paper plate piece.
- Your paper plate gumball machine is complete! Whether you hang it on the fridge, display it on a shelf, or gift it to a loved one, it's sure to bring smiles all around.


NEED MORE HELP DOWNLOADING OUR FREE PRINTABLES? PLEASE REFER TO OUR FAQ PAGE
If you've enjoyed our content or have any thoughts to share, we'd love to hear from you! Mention @gluedtomycrafts or tag #gluedtomycrafts on Instagram!