Create a fun and colorful thumbprint mushroom craft with this easy tutorial. Perfect for kids and adults alike!


Looking for a fun and engaging craft project to do with your kids? Our latest and greatest “thumbprint mushroom” tutorial is the perfect activity! It’s simple, creative, and provides hours of entertainment for children of all ages.
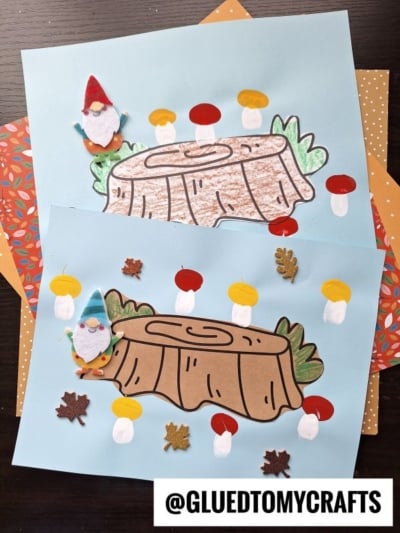
Today’s tutorial is a type of art project where children use their thumbs dipped in paint to create mushroom shapes on paper. This craft combines the simplicity of finger painting with the structure of creating a recognizable object, making it a great balance between free-form art and guided creativity.

This activity is not only fun and easy but also allows children to explore their artistic side using just a few simple materials. This makes it an inexpensive and straightforward activity that doesn’t require a lot of preparation or cleanup!
Card Supplies:
- Blank Tree Log Printable – on our landing page
- White Cardstock Paper
- Blue Cardstock Paper
- Crayons or Coloring Pencils
- Scissors
- Glue Stick
- Washable Craft Paint {choice of color}
- Washable Craft Paint {white}
- Baby Wipes
- Embellishments
Directions:
- First print out the provided blank tree log printable on white cardstock paper. One printout will give you TWO opportunities to do this mushroom craft.
- Use crayons or coloring pencils to color in ONE of the log designs.
- When done, trim it out.
- Adhere the log shape to the center of your blue cardstock paper.
- Next up – the finger paint step. Squirt your paint colors on a small paper plate.
- Dip your thumb in the white paint and then press it down anywhere on the log design/on your paper, vertically to make a stem. Repeat this step to make multiple stems, spacing them out evenly on the paper.
- Use baby wipes to remove the excess paint.
- The mushroom cap is the most recognizable part of the mushroom. To make the caps, dip your thumb into the remaining craft paint and press it firmly at the top of each stem you just made. The result should resemble the classic mushroom shape. At this point in time, you can also explore different shapes and sizes for the mushroom caps. You can create round, oval, or even heart-shaped caps. The variety will make your artwork more dynamic and interesting.
- Once done with the paint completely, use baby wipes to remove excess paint from fingers {as well as washing up at the sink!}
- To finish it off, add any other embellishments you see fit and then allow it to dry completely before displaying proudly for all to see!
RELATED —> Paper Plate Mushrooms
Our thumbprint mushroom art tutorial is a delightful and educational craft that offers numerous benefits for children. It fosters creativity, fine motor skills, and bonding time, all while being incredibly fun. Not to mention it’s perfect for spring AND fall!
By following the steps and tips outlined in this blog post, you’ll be able to create beautiful thumbprint mushrooms and explore endless artistic possibilities with your kids. Don’t forget to display their artwork proudly and encourage them to continue exploring their creativity. Happy crafting!

Thumbprint Mushrooms On Log Craft Idea For Kids
Create a fun and colorful thumbprint mushroom craft with this easy tutorial. Perfect for kids and adults alike!
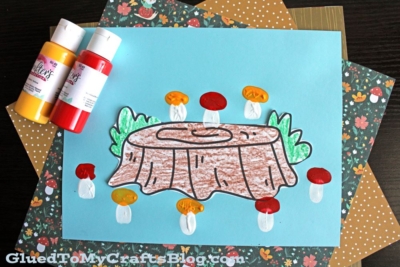
Here’s your checklist of supplies to bring this craft to life:
Prepare your creative haven by laying down a protective cover before the crafting magic begins!
Directions:
- First print out the provided blank tree log printable on white cardstock paper. One printout will give you TWO opportunities to do this mushroom craft.
- Use crayons or coloring pencils to color in ONE of the log designs.
- When done, trim it out.
- Adhere the log shape to the center of your blue cardstock paper.
- Next up - the finger paint step. Squirt your paint colors on a small paper plate.
- Dip your thumb in the white paint and then press it down anywhere on the log design/on your paper, vertically to make a stem. Repeat this step to make multiple stems, spacing them out evenly on the paper.
- Use baby wipes to remove the excess paint.
- The mushroom cap is the most recognizable part of the mushroom. To make the caps, dip your thumb into the remaining craft paint and press it firmly at the top of each stem you just made. The result should resemble the classic mushroom shape. At this point in time, you can also explore different shapes and sizes for the mushroom caps. You can create round, oval, or even heart-shaped caps. The variety will make your artwork more dynamic and interesting.
- Once done with the paint completely, use baby wipes to remove excess paint from fingers {as well as washing up at the sink!}
- To finish it off, add any other embellishments you see fit and then allow it to dry completely before displaying proudly for all to see!


NEED HELP DOWNLOADING OUR FREE PRINTABLES? PLEASE REFER TO OUR FAQ PAGE
If you've enjoyed our content or have any thoughts to share, we'd love to hear from you! Mention @gluedtomycrafts or tag #gluedtomycrafts on Instagram!