Get ready to turn a simple kitchen tool into your new favorite art supply! We’re about to create some adorable, fluffy sheep using something you probably have in your drawer right now: a potato masher. This project is wonderfully simple, making it perfect for an afternoon of fun with your little ones.
The unique texture from the masher creates the perfect woolly coat for our farmyard friends. It’s a fantastic way to combine sensory play with a creative art project. Let’s gather our supplies and get ready to stamp!
Materials Needed:
- Potato Masher (the kind with a waffle/grid pattern works best)
- White Craft Paint
- Green Cardstock Paper
- Blue Cardstock Paper
- Black Cardstock Paper
- Small Googly Eyes
- Scissors
- Craft Glue
- Paper Plate
Step-by-Step Instructions:
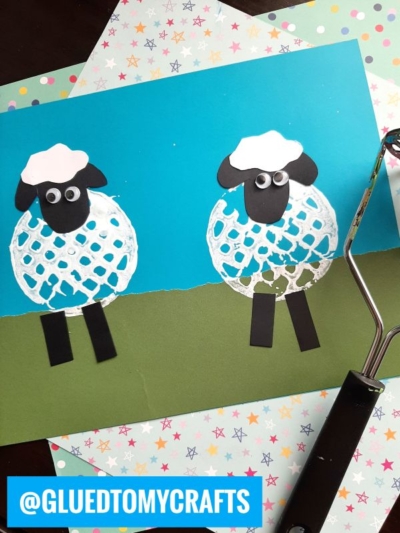
- Prepare Your Pasture: First, let’s create the scene for our sheep. Take your green cardstock and tear a strip along the long edge. This torn edge gives the appearance of a grassy hill. Glue this green strip along the bottom of your blue cardstock paper. Now you have a bright blue sky over a green field.
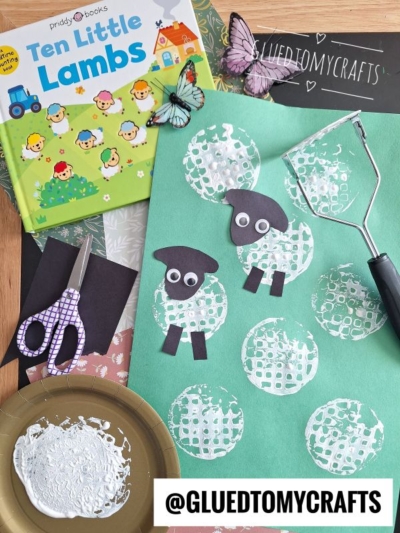
- Get Ready to Stamp: Squirt a good amount of white craft paint onto your paper plate. This will be your paint palette. Take your potato masher and press it firmly into the white paint, making sure the entire grid surface is coated.
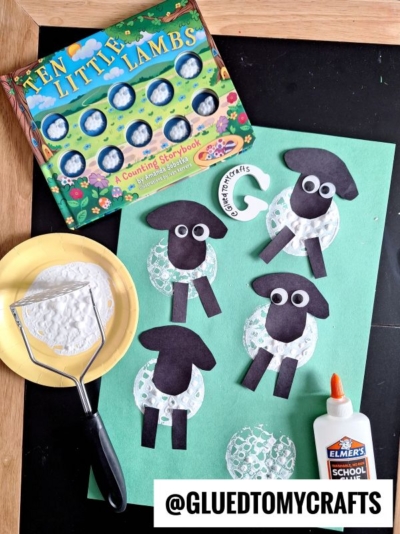
- Stamp Your Sheep: Carefully press the paint-covered potato masher onto the green “grass” area of your cardstock. Lift it straight up to reveal a textured, wool-like pattern. This will be your sheep’s body. You can stamp one sheep or create a whole flock! Let the paint dry completely before moving on.
- Create the Head and Legs: While the paint is drying, it’s time to cut out the other parts for your sheep from the black cardstock. For each sheep, you will need: One oval or circle shape for the head. Two small, thin rectangles for the legs.
- Add the Details: It’s time to bring your sheep to life! Glue the black head onto the edge of the white stamped body. Then, attach the two rectangular legs to the bottom of the body so they stand on the green grass.
- Give Them Sight: The final touch is the eyes. Carefully glue two small googly eyes onto each black head. Now your sheep can see!
RELATED —> Pom Pom Painted Sheep Cupcake Craft Idea
And there you have it! Your very own potato masher stamped sheep. This craft is all about having fun and being creative, so feel free to add your own personal touches. We hope you have a wonderful time creating these cute and woolly sheep. Happy crafting, my friends!

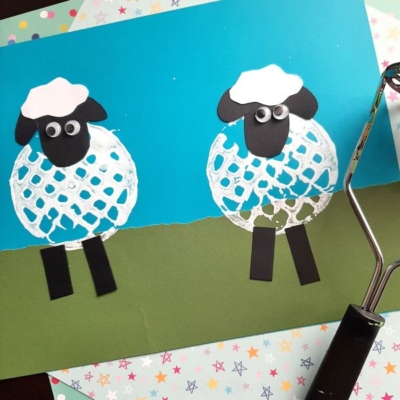
Potato Masher Stamped Sheep Craft Idea
Get creative with a potato masher stamped sheep craft! Simple materials transform into a fun art project for everyone.
Here’s your checklist of supplies to bring this craft to life:
- White Craft Paint
- Green Cardstock Paper
- Blue Cardstock Paper
- Black Cardstock Paper
- Small Googly Eyes
- Craft Glue
- Paper Plate
Prepare your creative haven by laying down a protective cover before the crafting magic begins!
Directions:
- Prepare Your Pasture: First, let's create the scene for our sheep. Take your green cardstock and tear a strip along the long edge. This torn edge gives the appearance of a grassy hill. Glue this green strip along the bottom of your blue cardstock paper. Now you have a bright blue sky over a green field.
- Get Ready to Stamp: Squirt a good amount of white craft paint onto your paper plate. This will be your paint palette. Take your potato masher and press it firmly into the white paint, making sure the entire grid surface is coated.
- Stamp Your Sheep: Carefully press the paint-covered potato masher onto the green "grass" area of your cardstock. Lift it straight up to reveal a textured, wool-like pattern. This will be your sheep's body. You can stamp one sheep or create a whole flock! Let the paint dry completely before moving on.
- Create the Head and Legs: While the paint is drying, it's time to cut out the other parts for your sheep from the black cardstock. For each sheep, you will need:
- One oval or circle shape for the head.
- Two small, thin rectangles for the legs.
- Add the Details: It's time to bring your sheep to life! Glue the black head onto the edge of the white stamped body. Then, attach the two rectangular legs to the bottom of the body so they stand on the green grass.
- Give Them Sight: The final touch is the eyes. Carefully glue two small googly eyes onto each black head. Now your sheep can see!
CLICK HERE TO PRINT THE DIRECTIONS FOR THIS CRAFT
If you've enjoyed our content or have any thoughts to share, we'd love to hear from you! Mention @gluedtomycrafts or tag #gluedtomycrafts on Instagram!