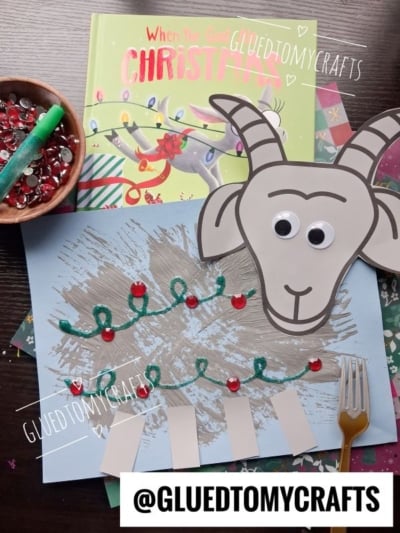
Some books beg to be turned into a craft the second you close the cover. When the Goat Ate Christmas is one of them. One look at that wide-eyed goat tangled in a string of holiday lights, and I knew exactly what we were making next.
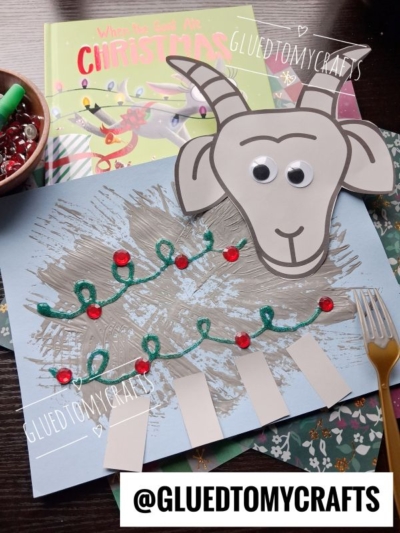
This fork painted goat craft is simple, a little messy in the best way, and full of sparkle. It pairs perfectly with a cozy Christmas story time at home, in the classroom, or at the library.
A quick, honest note: A copy of When the Goat Ate Christmas was kindly sent to me recently. This is not a sponsored post. Nobody asked me to write it, and I wasn’t paid. I simply fell in love with this book and couldn’t wait to share it (and a craft to go with it) with you! If you would love to know more about Layla Sutton, you can CLICK THIS LINK to see ALL the books they have authored.
Craft Supplies:
- Free Goat Head Printable – from box.com – password is GLUEDTOMYCRAFTS2026
- Construction Paper {we used light blue}
- Gray Cardstock Paper {or white if you choose!}
- Gray Craft Paint
- Plastic Fork
- Scissors
- School Glue
- Glitter Glue
- Small Rhinestones
- Wiggle Eyes {two per goat craft}
Directions:
Step 1: Prep the Goat Pieces
Before you start painting, print out our free provided printable {listed above} and trim out the head shape.
Next, out the remaining cardstock paper, cut out four grey rectangle strips for legs. They don’t need to be perfect but they should be about the same size so your goat stands nice and steady.
Step 2: Fork Paint the Goat Body
Pour a small puddle of grey paint onto a paper plate. Dip the tines of the fork into the paint, then drag it across the center of the light blue paper in short, sweeping strokes.
Keep going until you’ve built up a big, textured oval shape. This is your goat’s fluffy body. Don’t worry about making it perfect. Lumpy, bumpy, and scruffy all look adorable.
Let the paint dry completely before moving on. This usually takes about 15 to 20 minutes, depending on how thick the paint is.
Step 3: Add the Legs
Once the paint is dry, glue the four grey leg strips along the bottom edge of the painted body. Line them up so they hang down from the goat’s belly toward the bottom of the page.
Step 4: Attach the Goat Head
Glue the goat head to the upper right side of the body. Let it overlap the painted area a bit, and even peek over the top edge of the paper if you like. It gives the goat a fun, bouncy look, just like the one on the book cover.
Press two googly eyes onto the face. Suddenly, your goat has personality.
Step 5: Draw the Christmas Lights
Now for the sparkle. Squeeze the green glitter glue across the goat’s body in wavy, looping lines. Two lines work nicely, but kids can add as many as they want. After all, this goat clearly found the whole box of lights.
Step 6: Add the Light Bulbs
While the glitter glue is still wet, press red rhinestones along the green lines. Space them out like bulbs on a light string. If any gems won’t stay put, add a tiny dot of craft glue underneath.
Set your goat flat to dry. Glitter glue can take a few hours to set fully, so this is a great time to read the book again.
RELATED —> Fork Painted Charlie Brown Christmas Tree
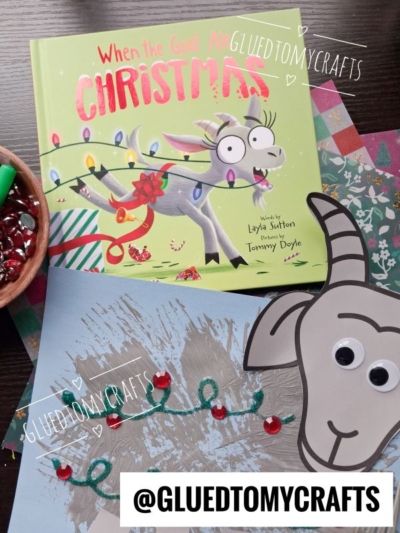
GRAB THE BOOK WHEN THE GOAT ATE CHRISTMAS VIA OUR AMAZON AFFILIATE LINK
I’d love to see your fork painted goats! Whether yours is neat and tidy or wildly tangled in lights, every one is a treasure. Snap a photo and tag me @GLUEDTOMYCRAFTS so I can cheer on your creations.
And if you pick up a copy of When the Goat Ate Christmas, give Layla Sutton and Tommy Doyle a little love too. Stories like this make the holidays brighter, one giggle (and one glittery goat) at a time.
Happy crafting, and merry reading!
